Workflow: How to Create a Workflow
A workflow is the way you connect voice agents, WhatsApp agents, and your tools in an automated sequence: it starts with an event and triggers a chain of actions. It’s the component you need whenever a use case involves more than one channel or requires logic (“if the customer doesn’t respond, then…”).
Written By Product
Last updated 2 months ago
1. How to Create a Workflow
Go to Workflow in the side menu, then click “Create workflow.” A window titled “How do you want to get started?” will open, showing two options on the same screen:
A. Describe it in your own words
. There’s a text field with this placeholder: “Describe what you want to achieve, and I’ll build it for you. Example: When a lead comes in from the website, call them and update the CRM." Write what you want to happen, then click "Build": the editor will open with the workflow diagram already drawn, ready for you to refine.
B. Start from a template
Under the heading “or choose a template,” you’ll find some ready-made templates (e.g., "New lead from the website, call them right away," "Call back those who didn’t answer," "Record the outcome after the call," "List of contacts, call and follow up"). At the bottom, there’s always "Start from scratch" for a blank canvas.
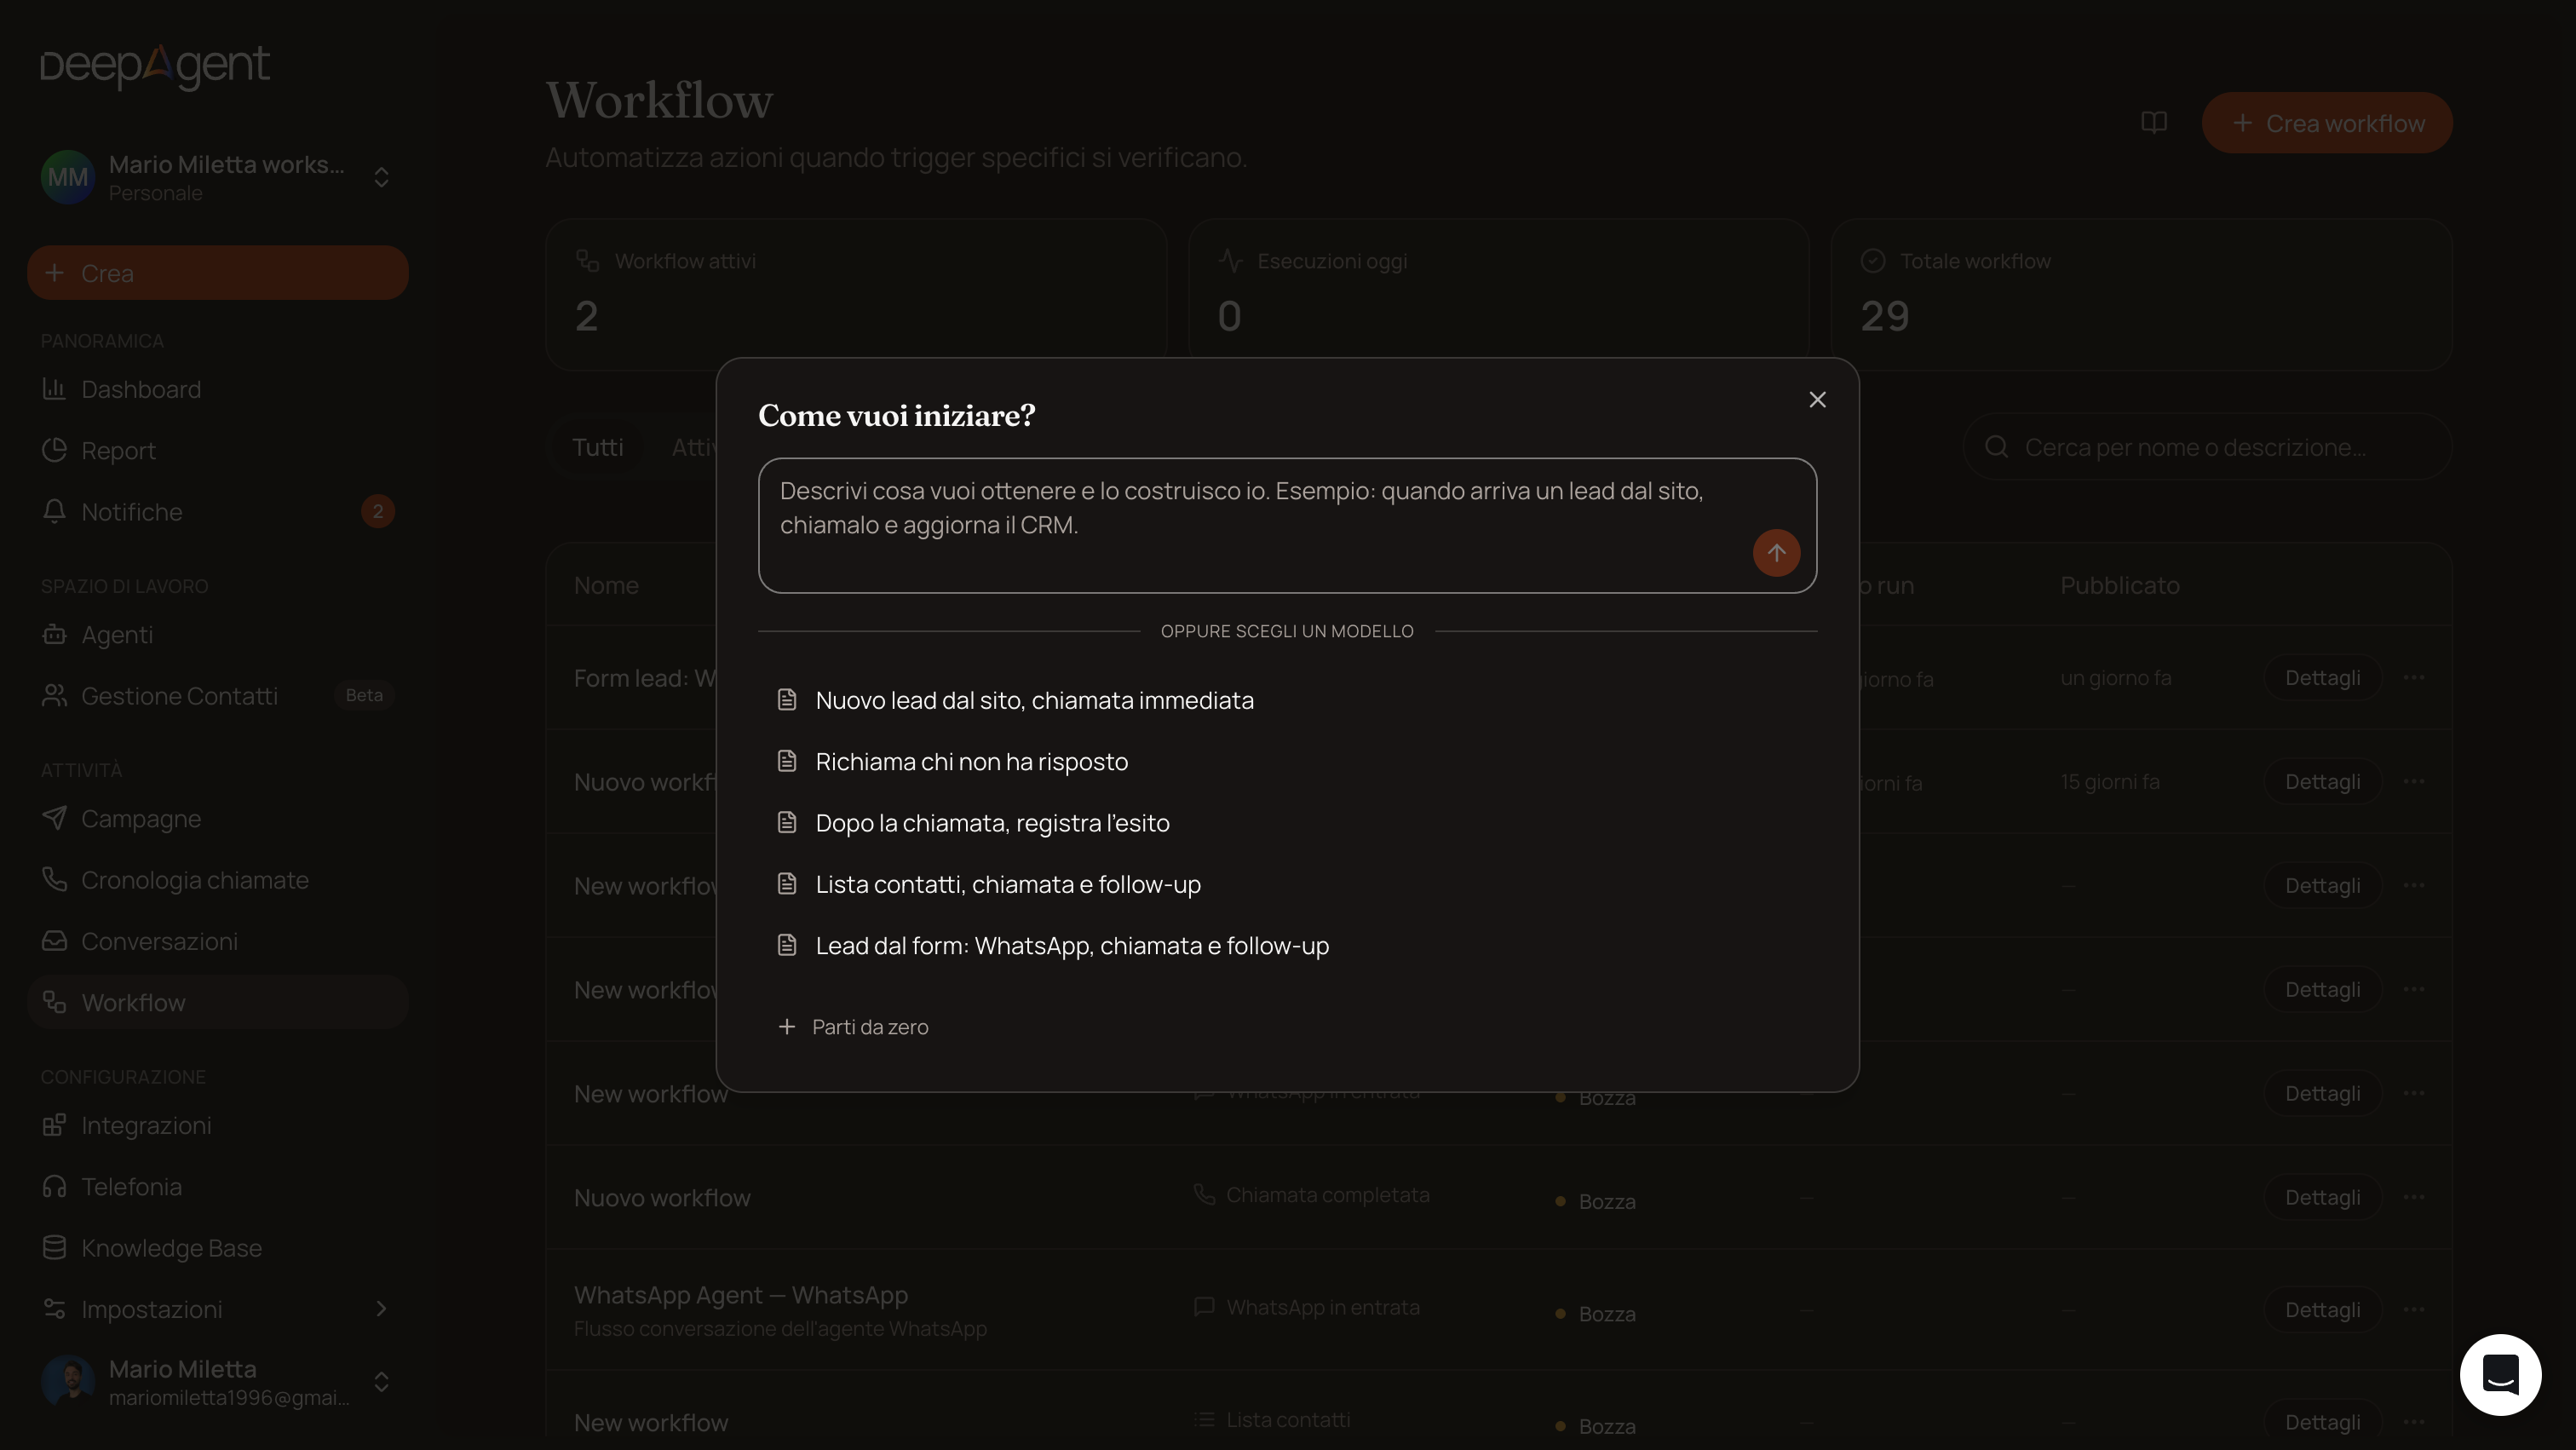
Whichever path you choose, you’ll end up in the workflow editor (/dashboard/workflow/{id}).
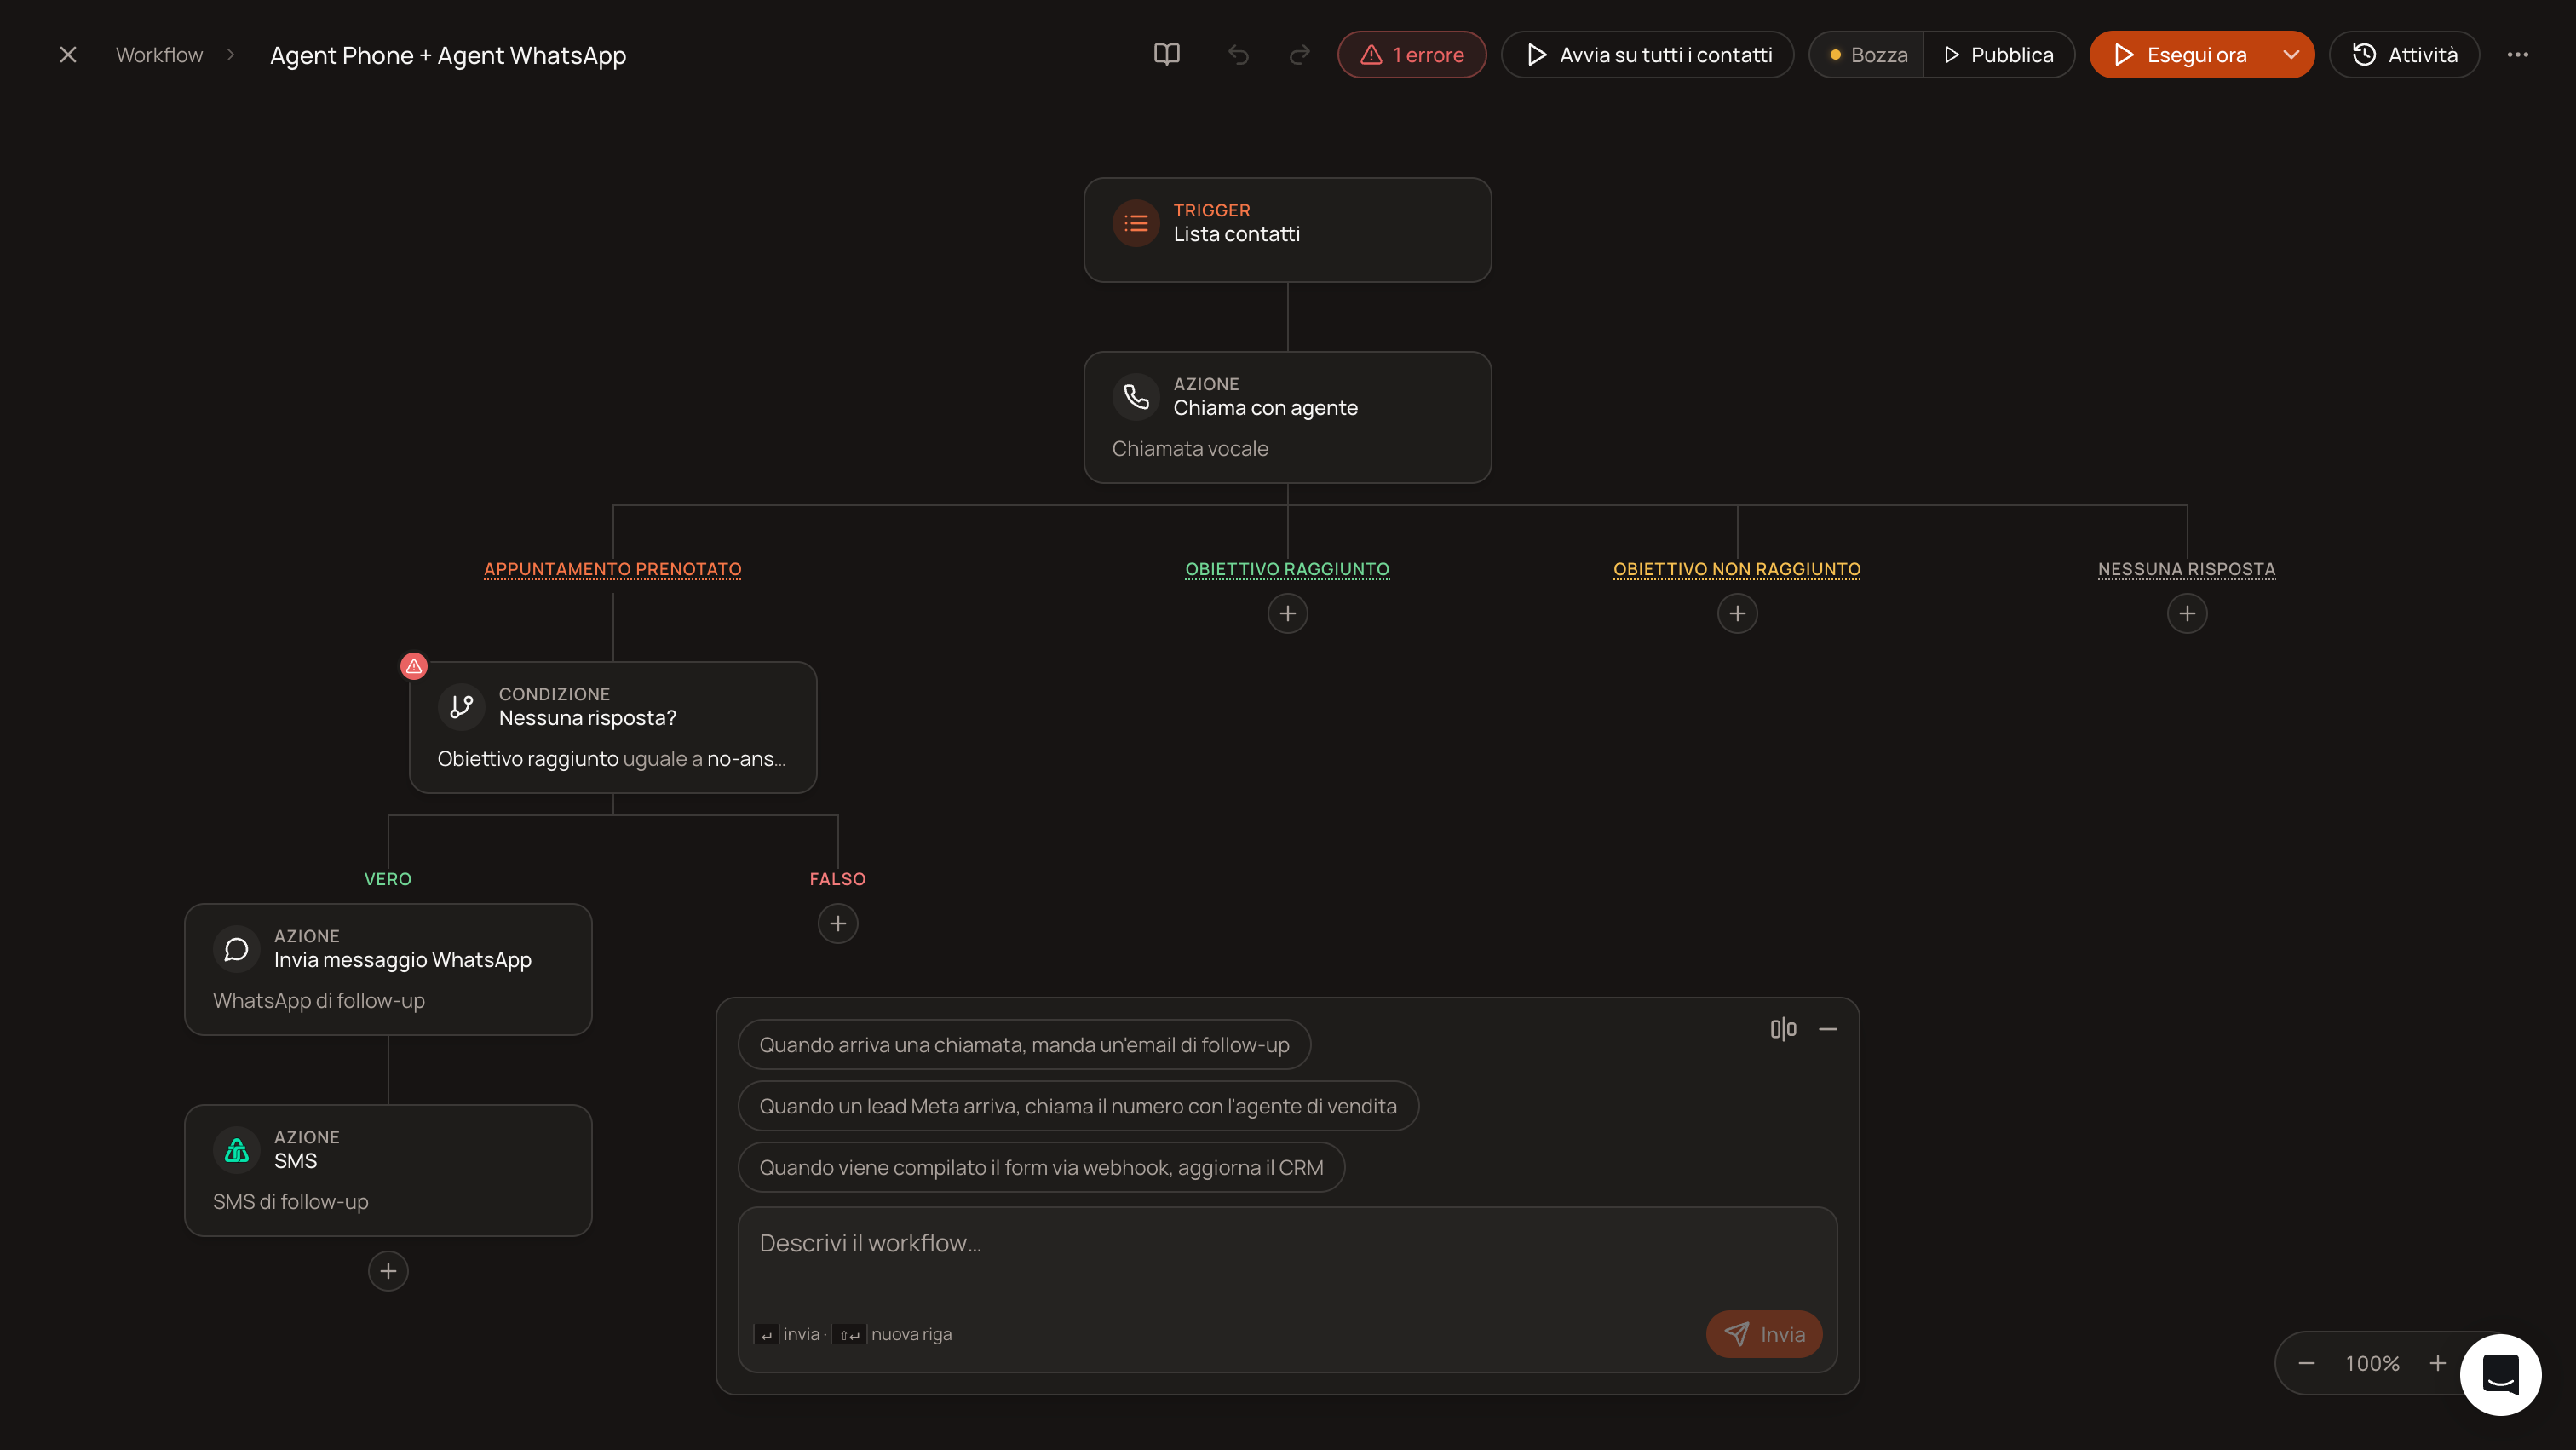
Note: The AI chat remains available even afterward, not just at the beginning. In the editor, you’ll always find a field at the bottom center of the canvas where you can type again—for example, “add a step that sends an email if the customer doesn’t respond”—and the AI will suggest the change: you’ll see a summary (“Suggested Changes”) with two buttons, “Apply Changes” and “Discard,” before the changes are applied to your workflow.
2. How the canvas works (important: it’s not drag-and-drop)
Unlike other similar tools, here you don’t drag a line from one node to another. Everything is done with clicks:
Each “free” output of a step has a small “+” button below it. Clicking it opens a search window (placeholder “Search for a node…”) with available nodes grouped by category: Triggers, Communication, Data, AI, Logic, Developers (plus an “Integrations” section if you’ve already connected any apps).
At the top of the same window, you’ll also find “Connect to existing step”: use this when you want a new branch (e.g., a second trigger or a “no” from a condition) to lead to a step you’ve already placed on the canvas, instead of creating a new one. You cannot connect to a trigger or create a duplicate of the same connection.
The empty canvas starts with the text “Start here” and a “+ Trigger” button: the trigger is always the first block—the event that sets everything in motion.
In the bottom right corner, you’ll find the zoom controls: −, the percentage (clicking it returns you to 100%), +, and a button to “Fit the workflow to the view.” Use the scroll wheel or trackpad to navigate the canvas.
Undo/redo:
⌘Zto undo,⇧⌘Zto redo (works up to 50 steps back).
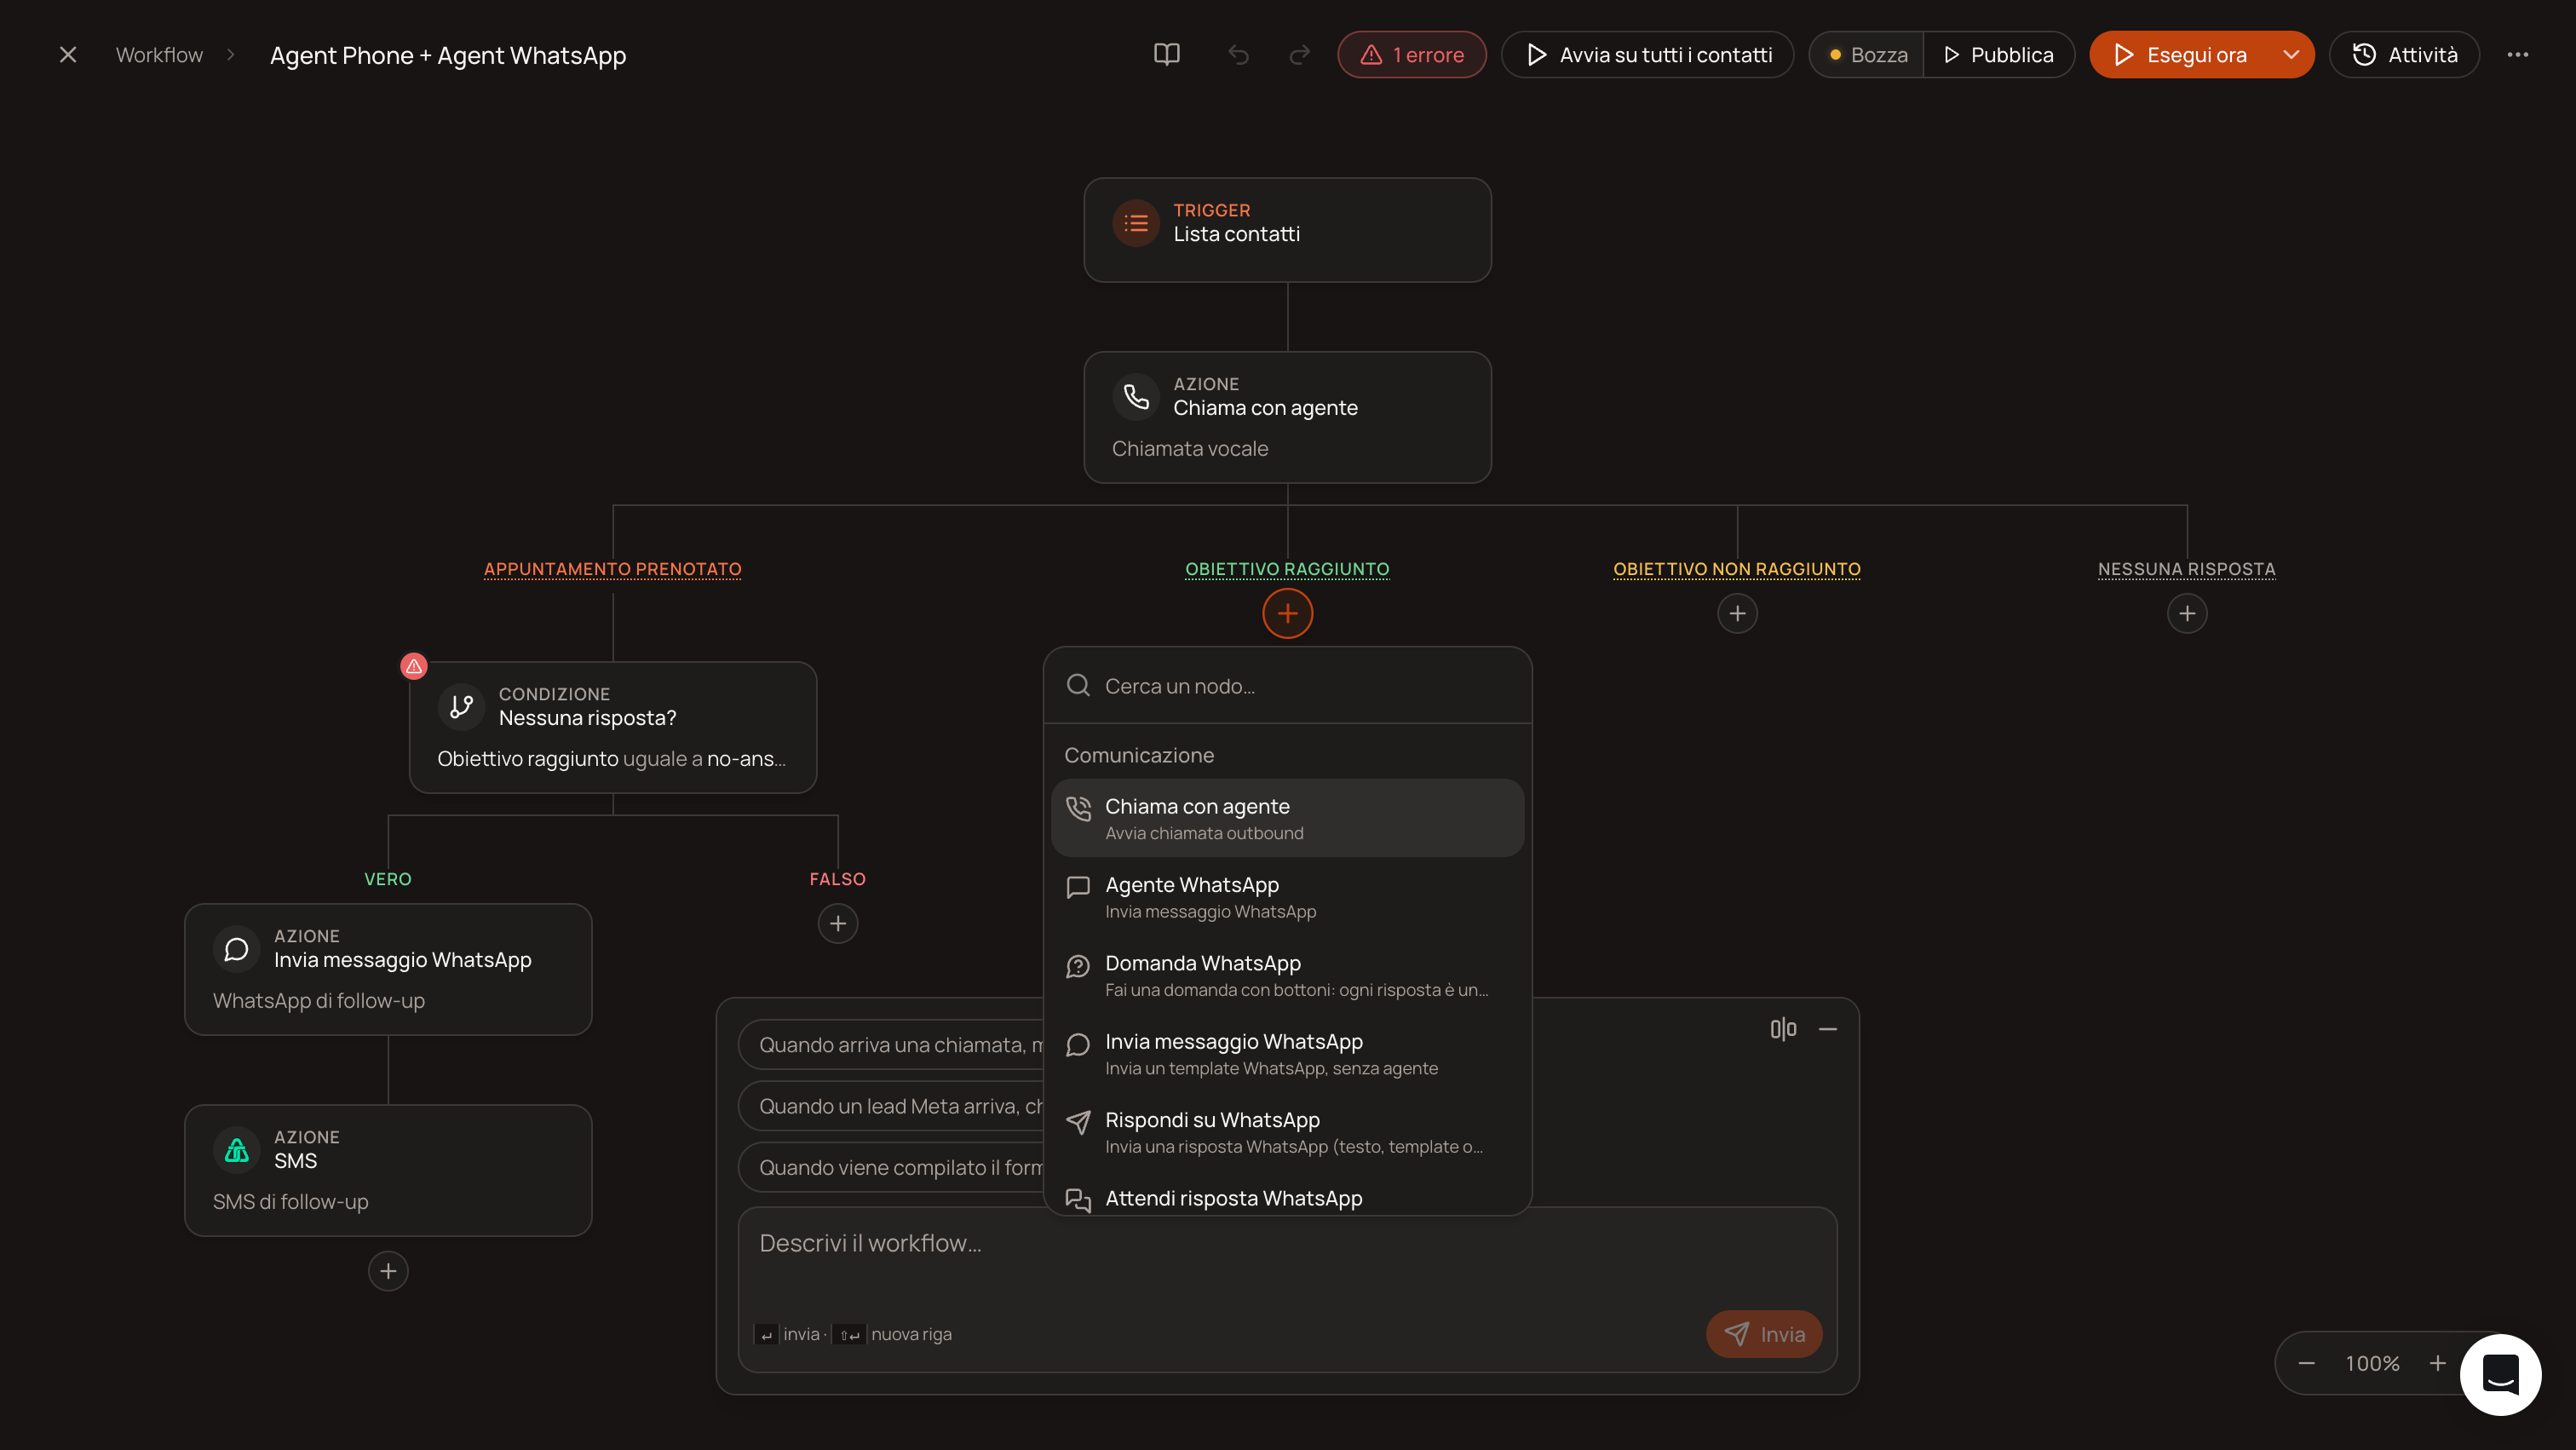
3. Triggers: What Can Trigger a Workflow
You can add these triggers using the “+” button:
You can set up multiple parallel triggers on the same workflow (e.g., "Call Completed" OR "Webhook Received" both trigger the same downstream chain): add both, then connect each trigger’s output to the same step using "Connect to Existing Step."
Incoming Call and Lead from Meta, as well as CRM Contact Changed, exist in the system but cannot yet be added manually via the “+” button (the first one connects automatically when you assign an agent to an incoming number; the other two are future integrations not currently available in the search window).
4. Actions: What a Workflow Can Do
Data you receive from a completed call, to be used in subsequent steps: status, duration, summary, sentiment, whether the goal was achieved, the custom data the agent collected, and—if an appointment was booked—the date, time, and link for the appointment.
5. Logic: Condition, Paths, Wait
Condition (“Filter”): branches into two paths, True / False. Create one or more rules: select a field from a list (don’t type it manually; click on the actual data, e.g., “call outcome”), choose an operator from Equal to, Not equal to, Contains, Greater than, Less than, Is empty, Is not empty, and a value. You can add more rules using “Add Rule,” group them using “Add Group,” and decide whether “All conditions” or “At least one condition” must be met.
Paths: the multi-branch version of the Condition. Write the rules for each path (using the same editor as above), and one or more paths can be triggered together—not just one. There’s always a fallback branch, “No Path,” which triggers if the contact doesn’t match any rule, so the workflow never silently stalls.
Wait: Pauses for a duration you set (minutes, hours, or days), then resumes on its own. It does not recheck conditions; it simply waits.
Other blocks that behave like forks: “Did they book?” (checks on its own whether an appointment has been scheduled; branches into “Booked”/“Not booked”), the WhatsApp Question (one branch per button), and “Wait for response” (“Response received”/“Timeout”) described above.
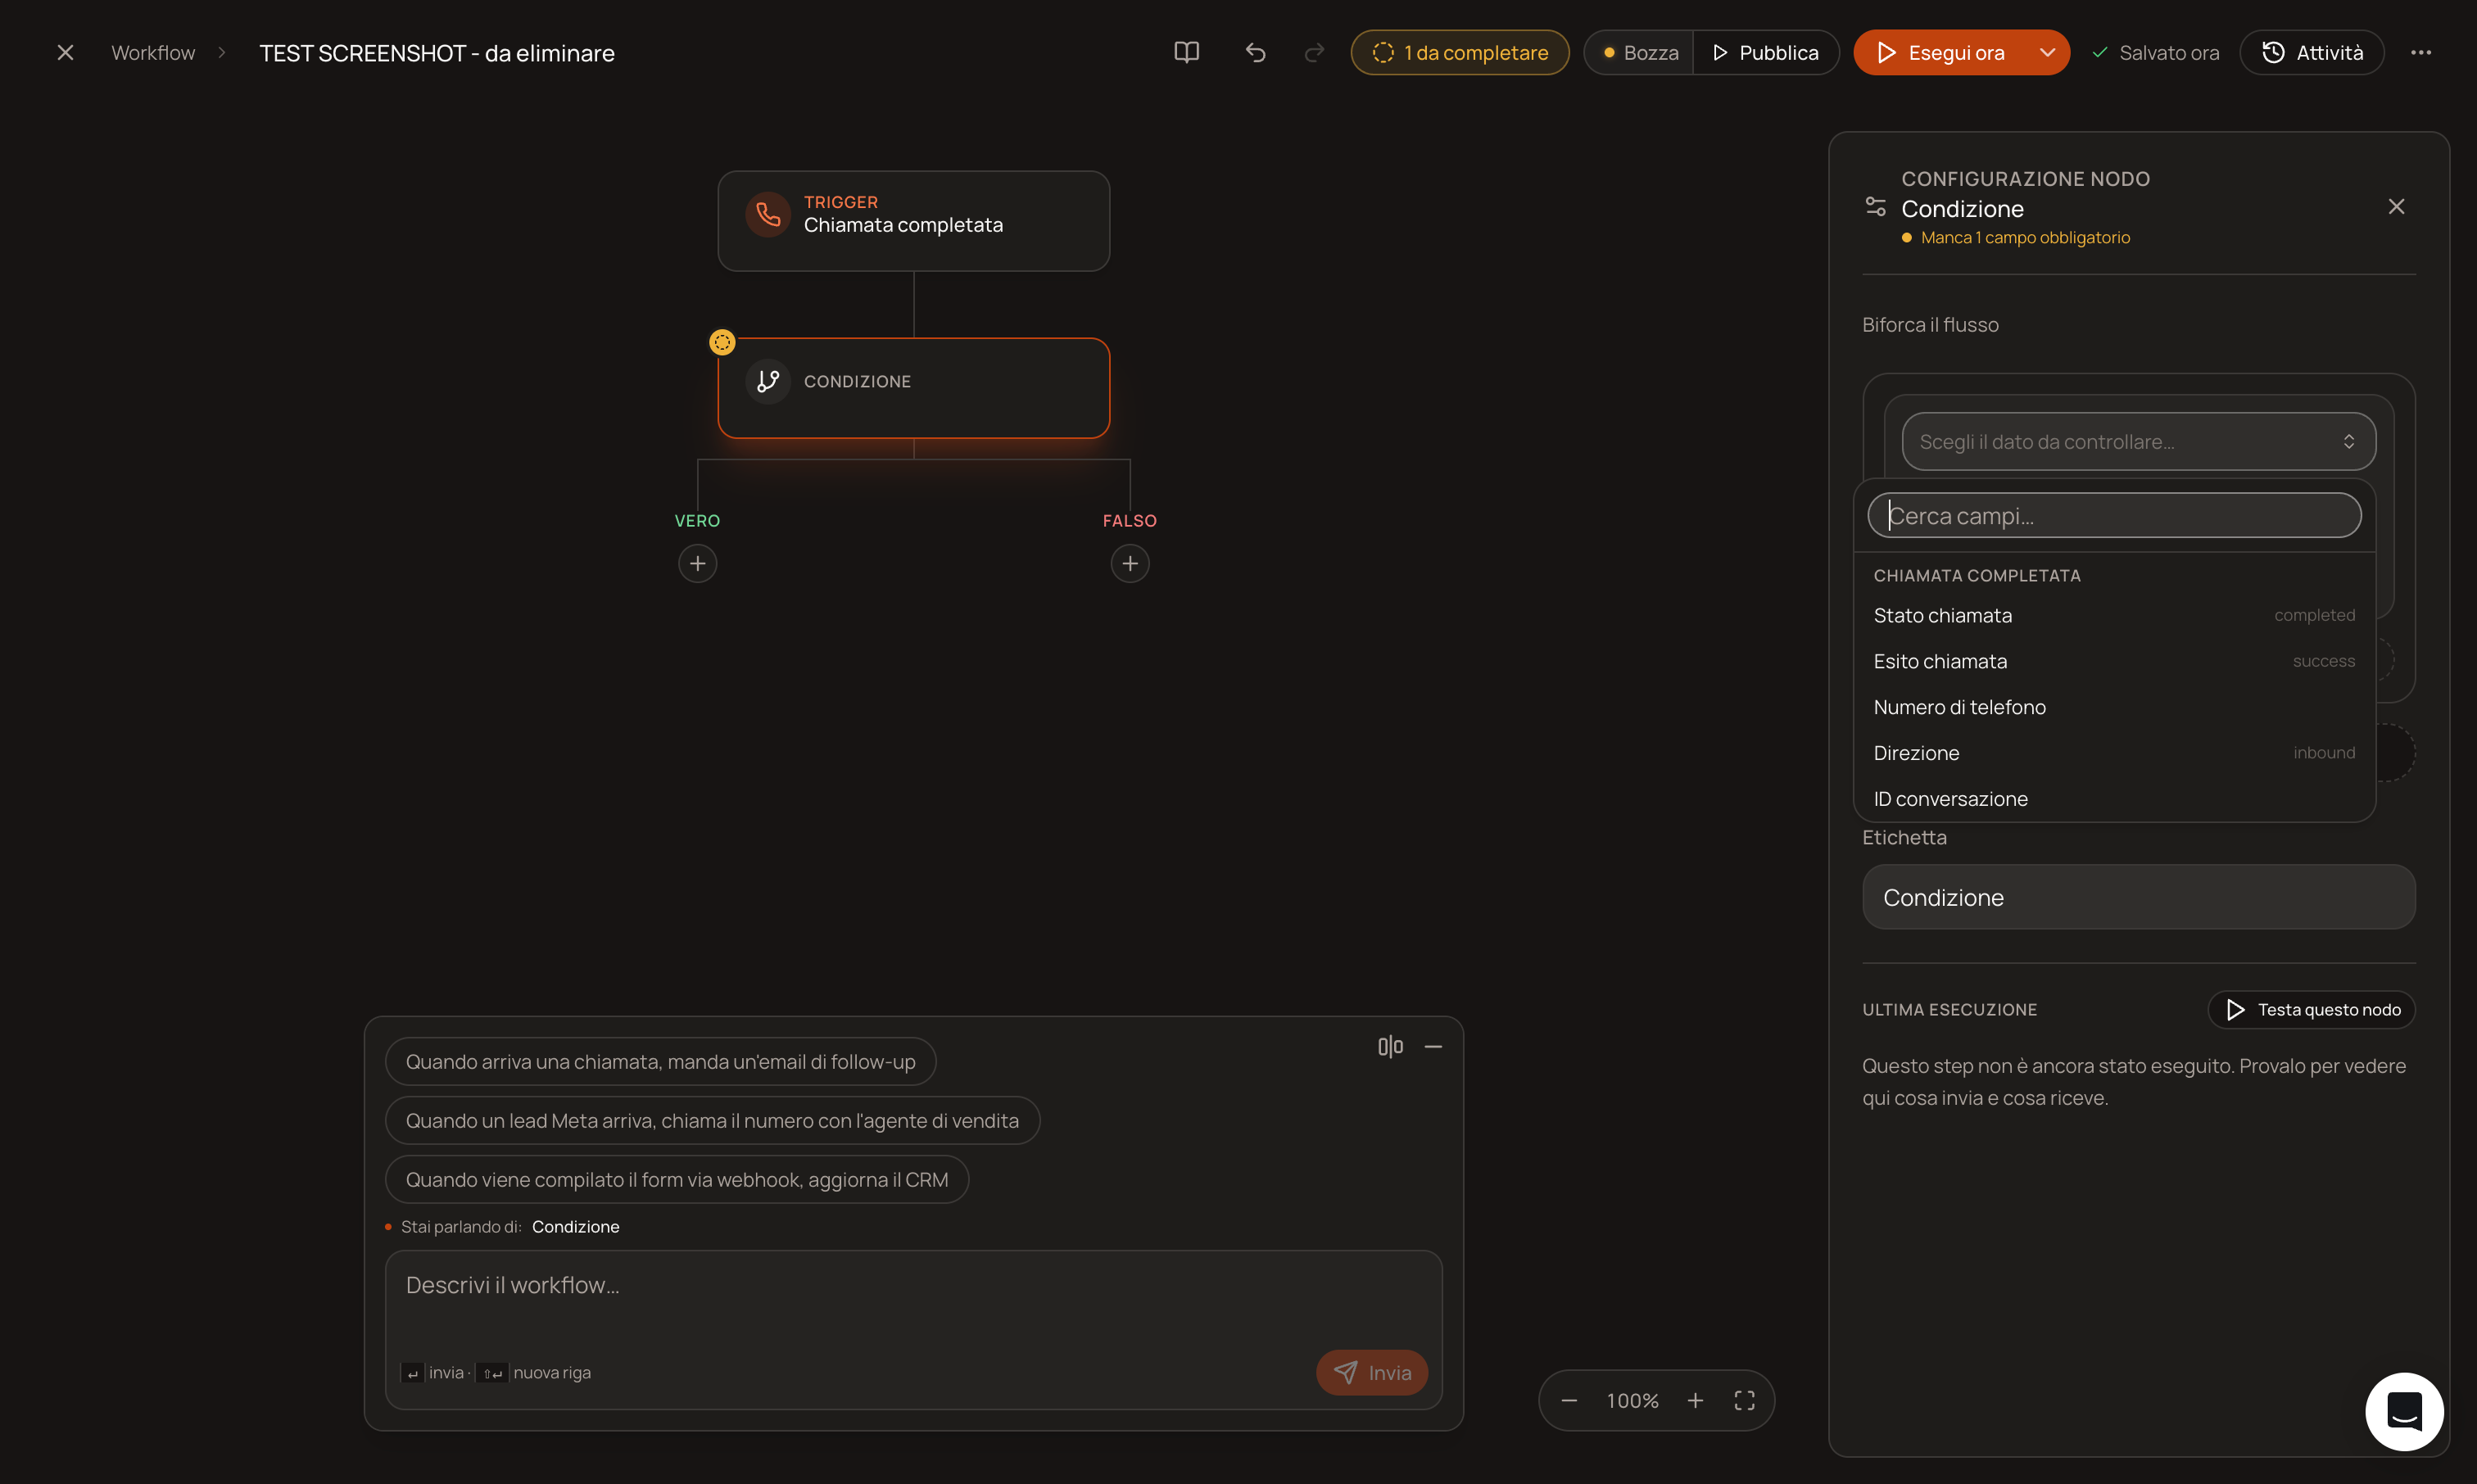
6. Using data from one step in another (“Insert Data”)
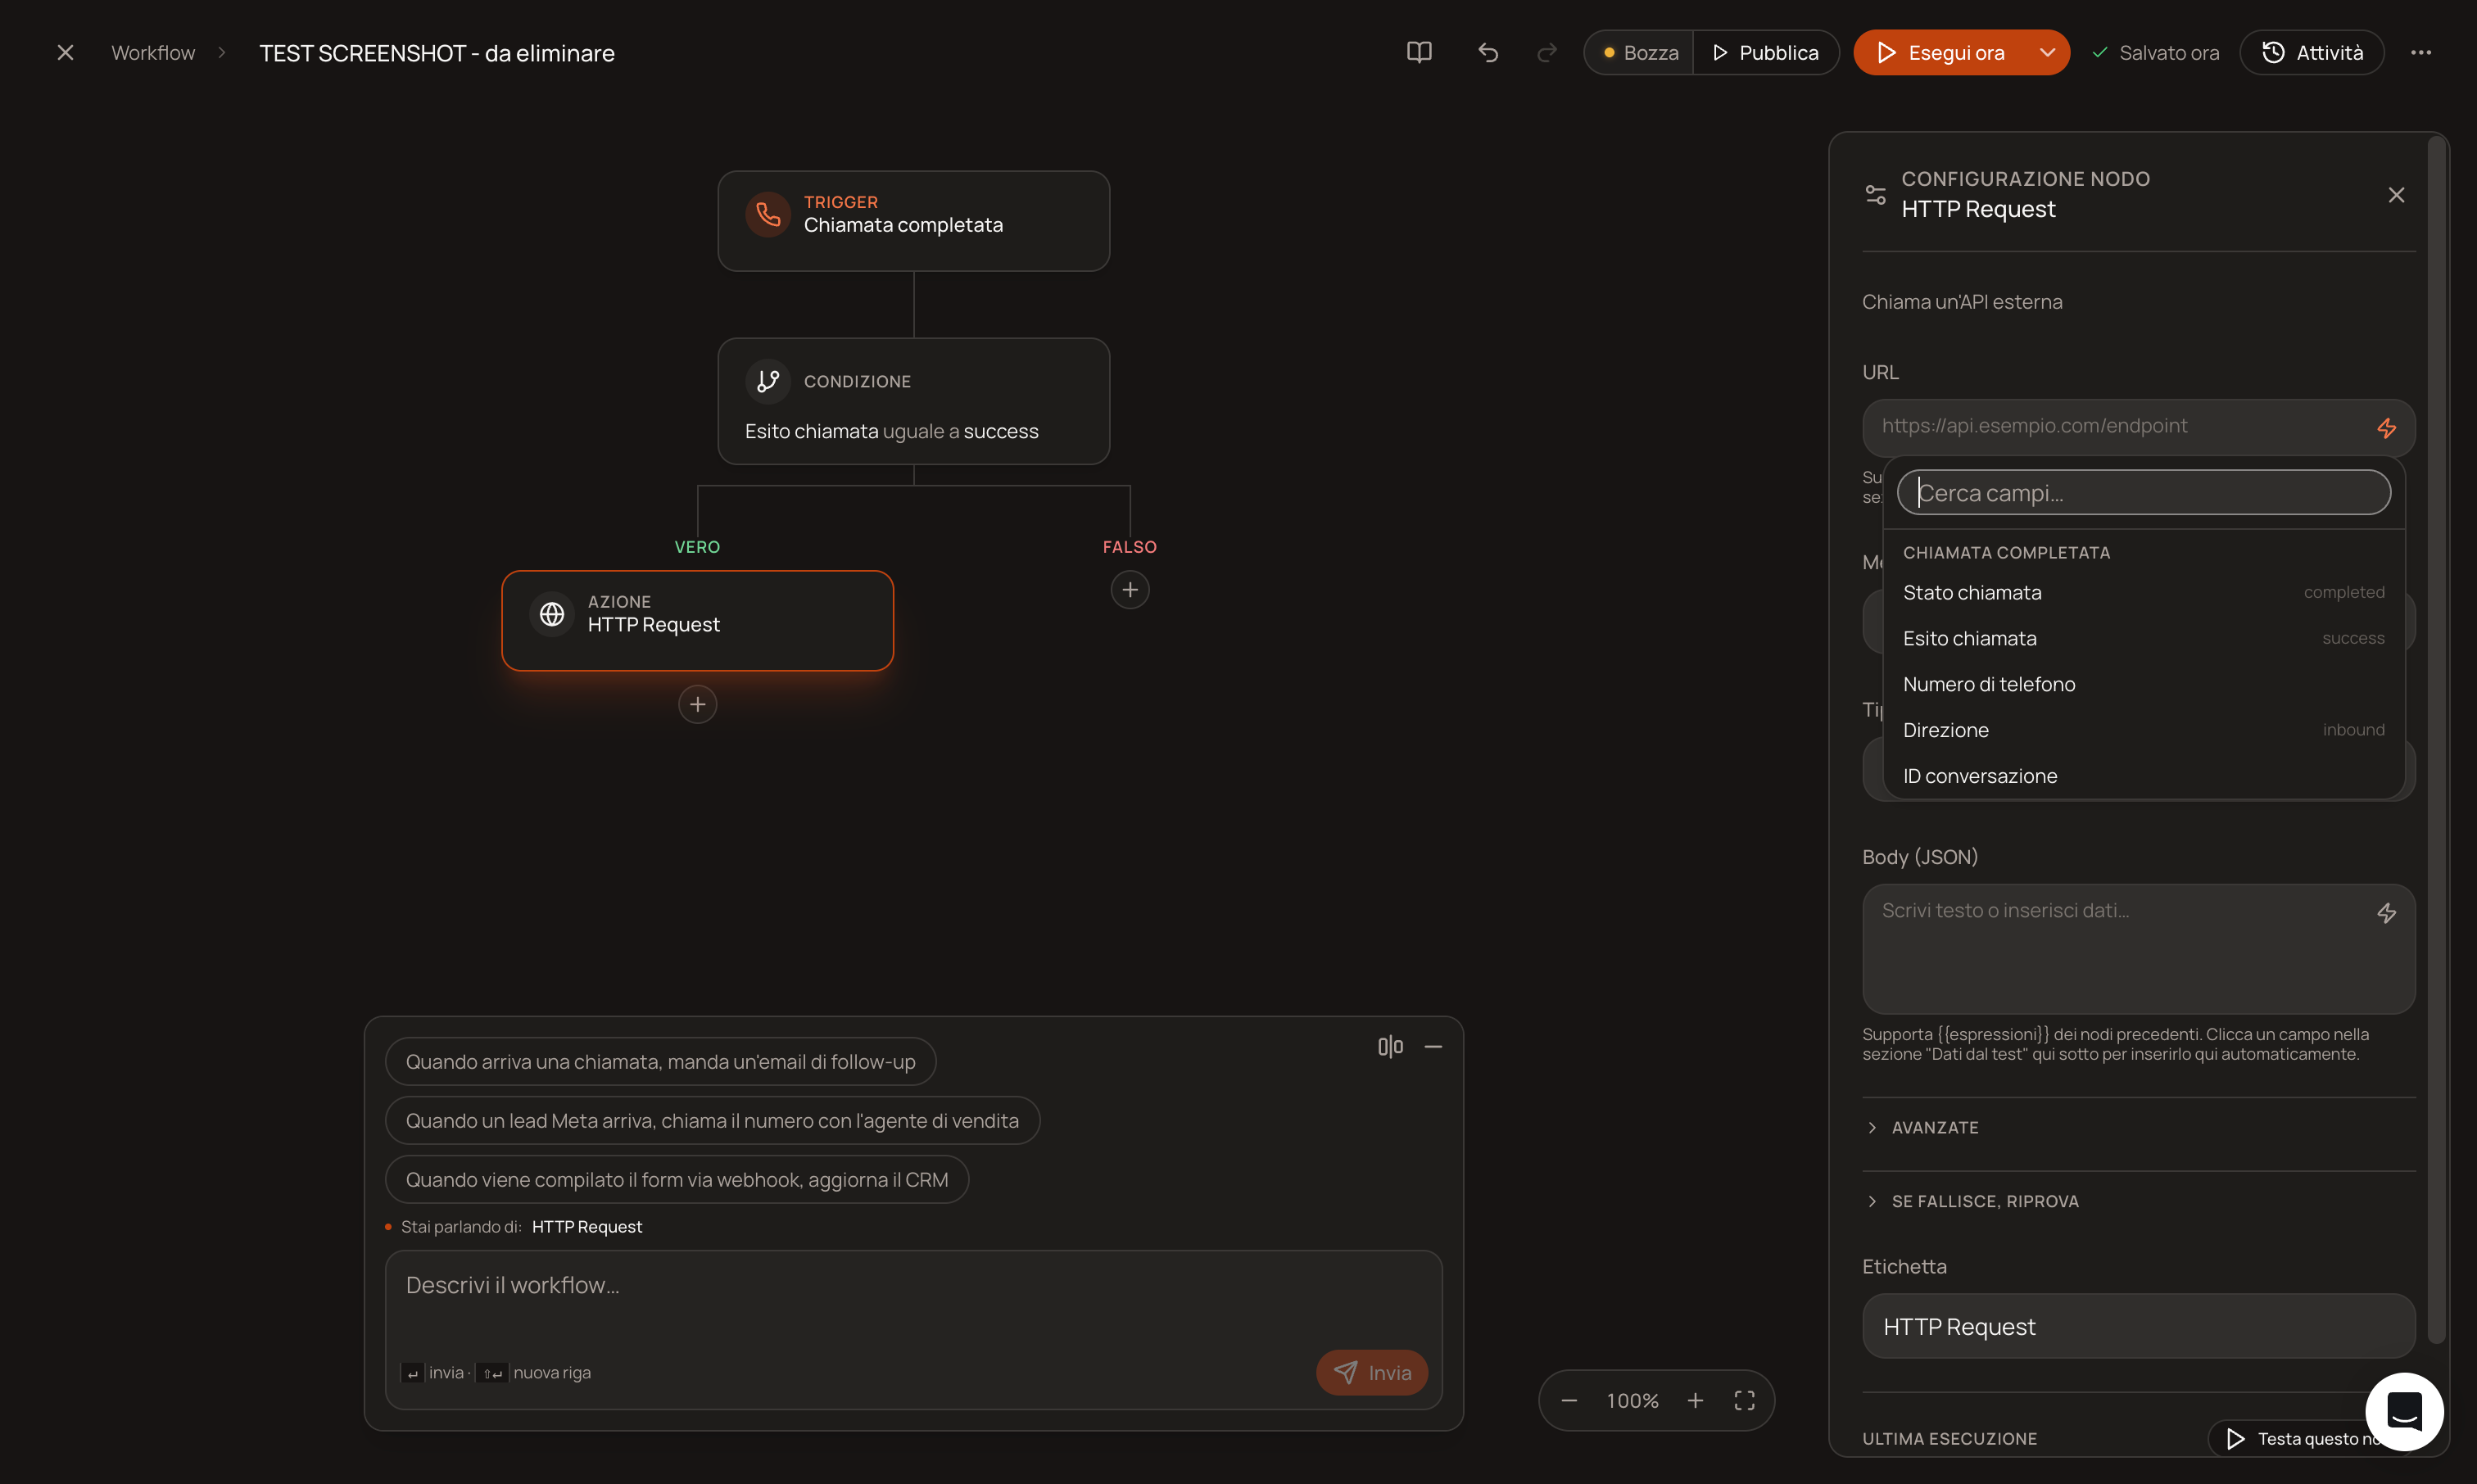
Every text field that supports it (recipient, message body, URL, prompt...) has an “Insert Data” button. Clicking it opens a list of available data, divided into two groups:
"Always available": steps that have definitely already been completed before this one, in every path.
"Path-dependent": steps that exist only on certain branches, so the data may not always be available.
When you select a field, you won’t see code like {{step.campo}}; instead, you’ll see a readable label, such as “Outgoing Call → Sentiment,” which you can delete or move just like a word. If you rename the step from which the data comes, all references to that data will update automatically. If, on the other hand, you delete the step, the chip turns red and displays “Missing variable,” so you can spot it right away.
For triggers that don’t have a fixed format (webhooks, rows in a Google Sheet, events from an integration), the available fields only appear after you run a test: open the step and click “Test this step” to see, using real values, what data actually comes through.
7. Publish, test, and check what happened
Saving: automatic one and a half seconds after every change (check the status at the top: “Saving…” → “Saved”; if something goes wrong, you’ll see “Save failed. Click to try again.”).
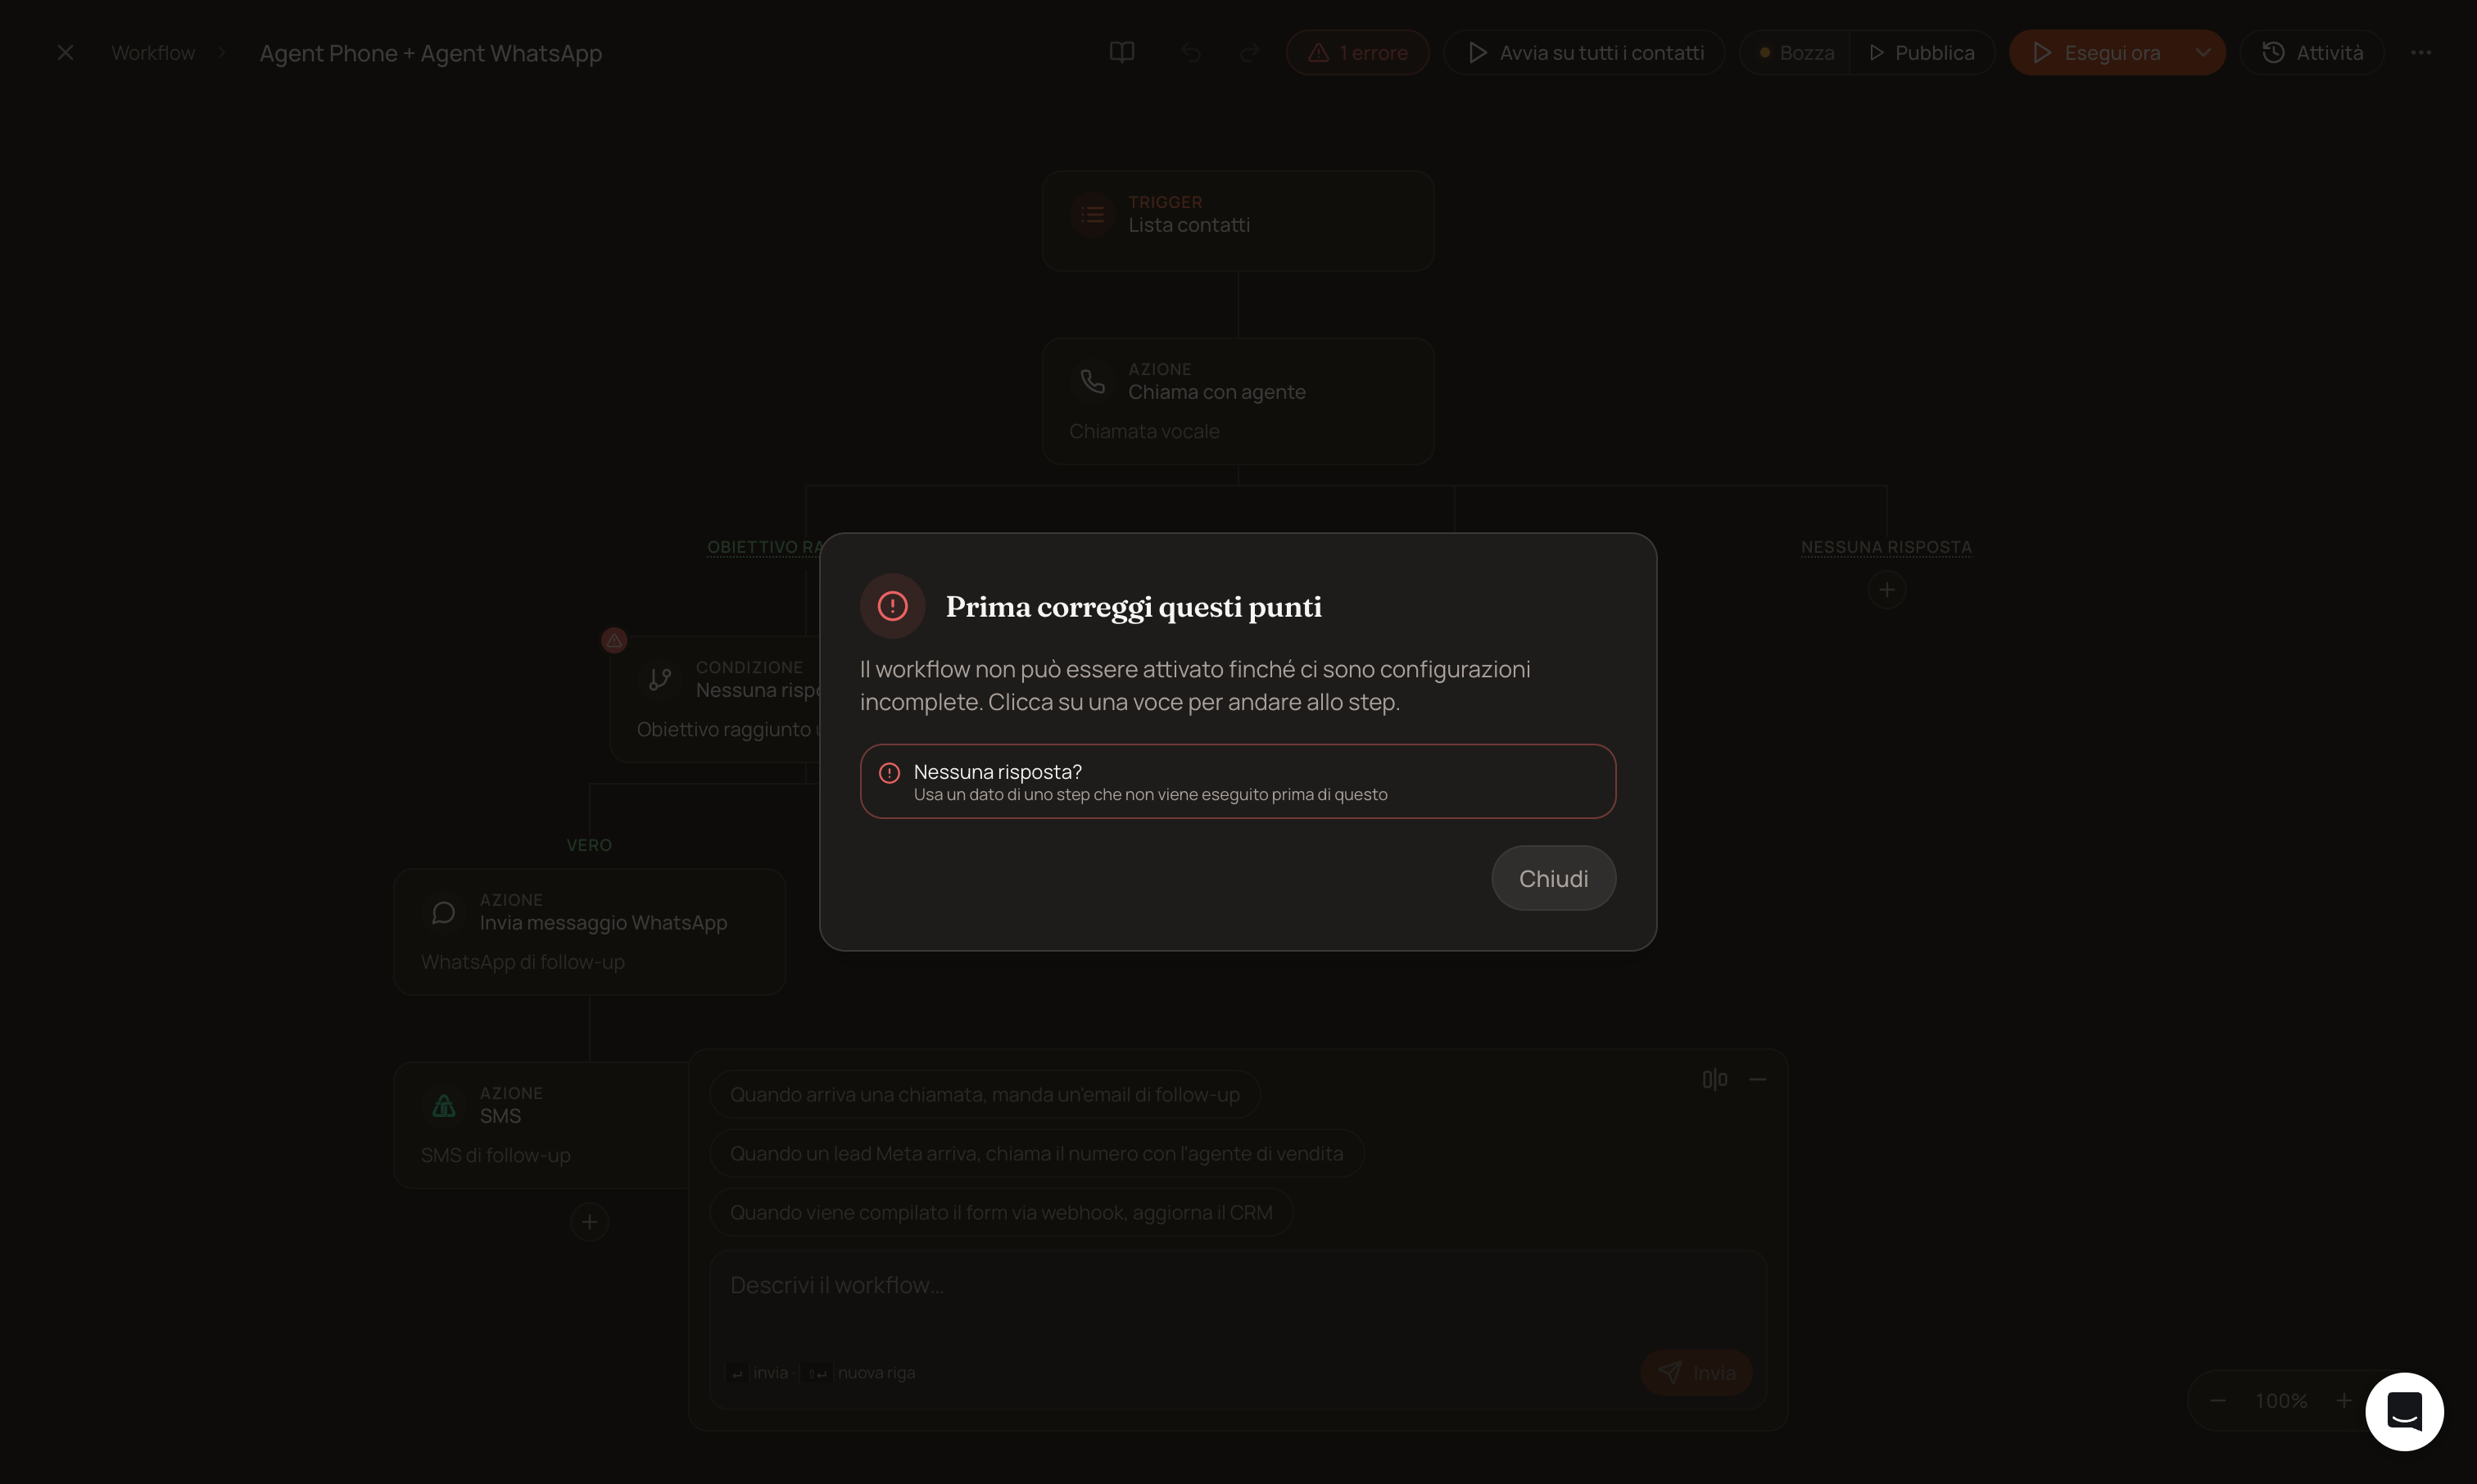
Publish: As long as the workflow is a draft, you’ll see “Publish” at the top. If the workflow has configuration errors, nothing irreversible happens: instead, a “Fix these issues first” window opens, listing exactly what’s missing (e.g., a condition that uses data from a step that hasn’t been completed yet): click the item to go directly to the step that needs fixing.
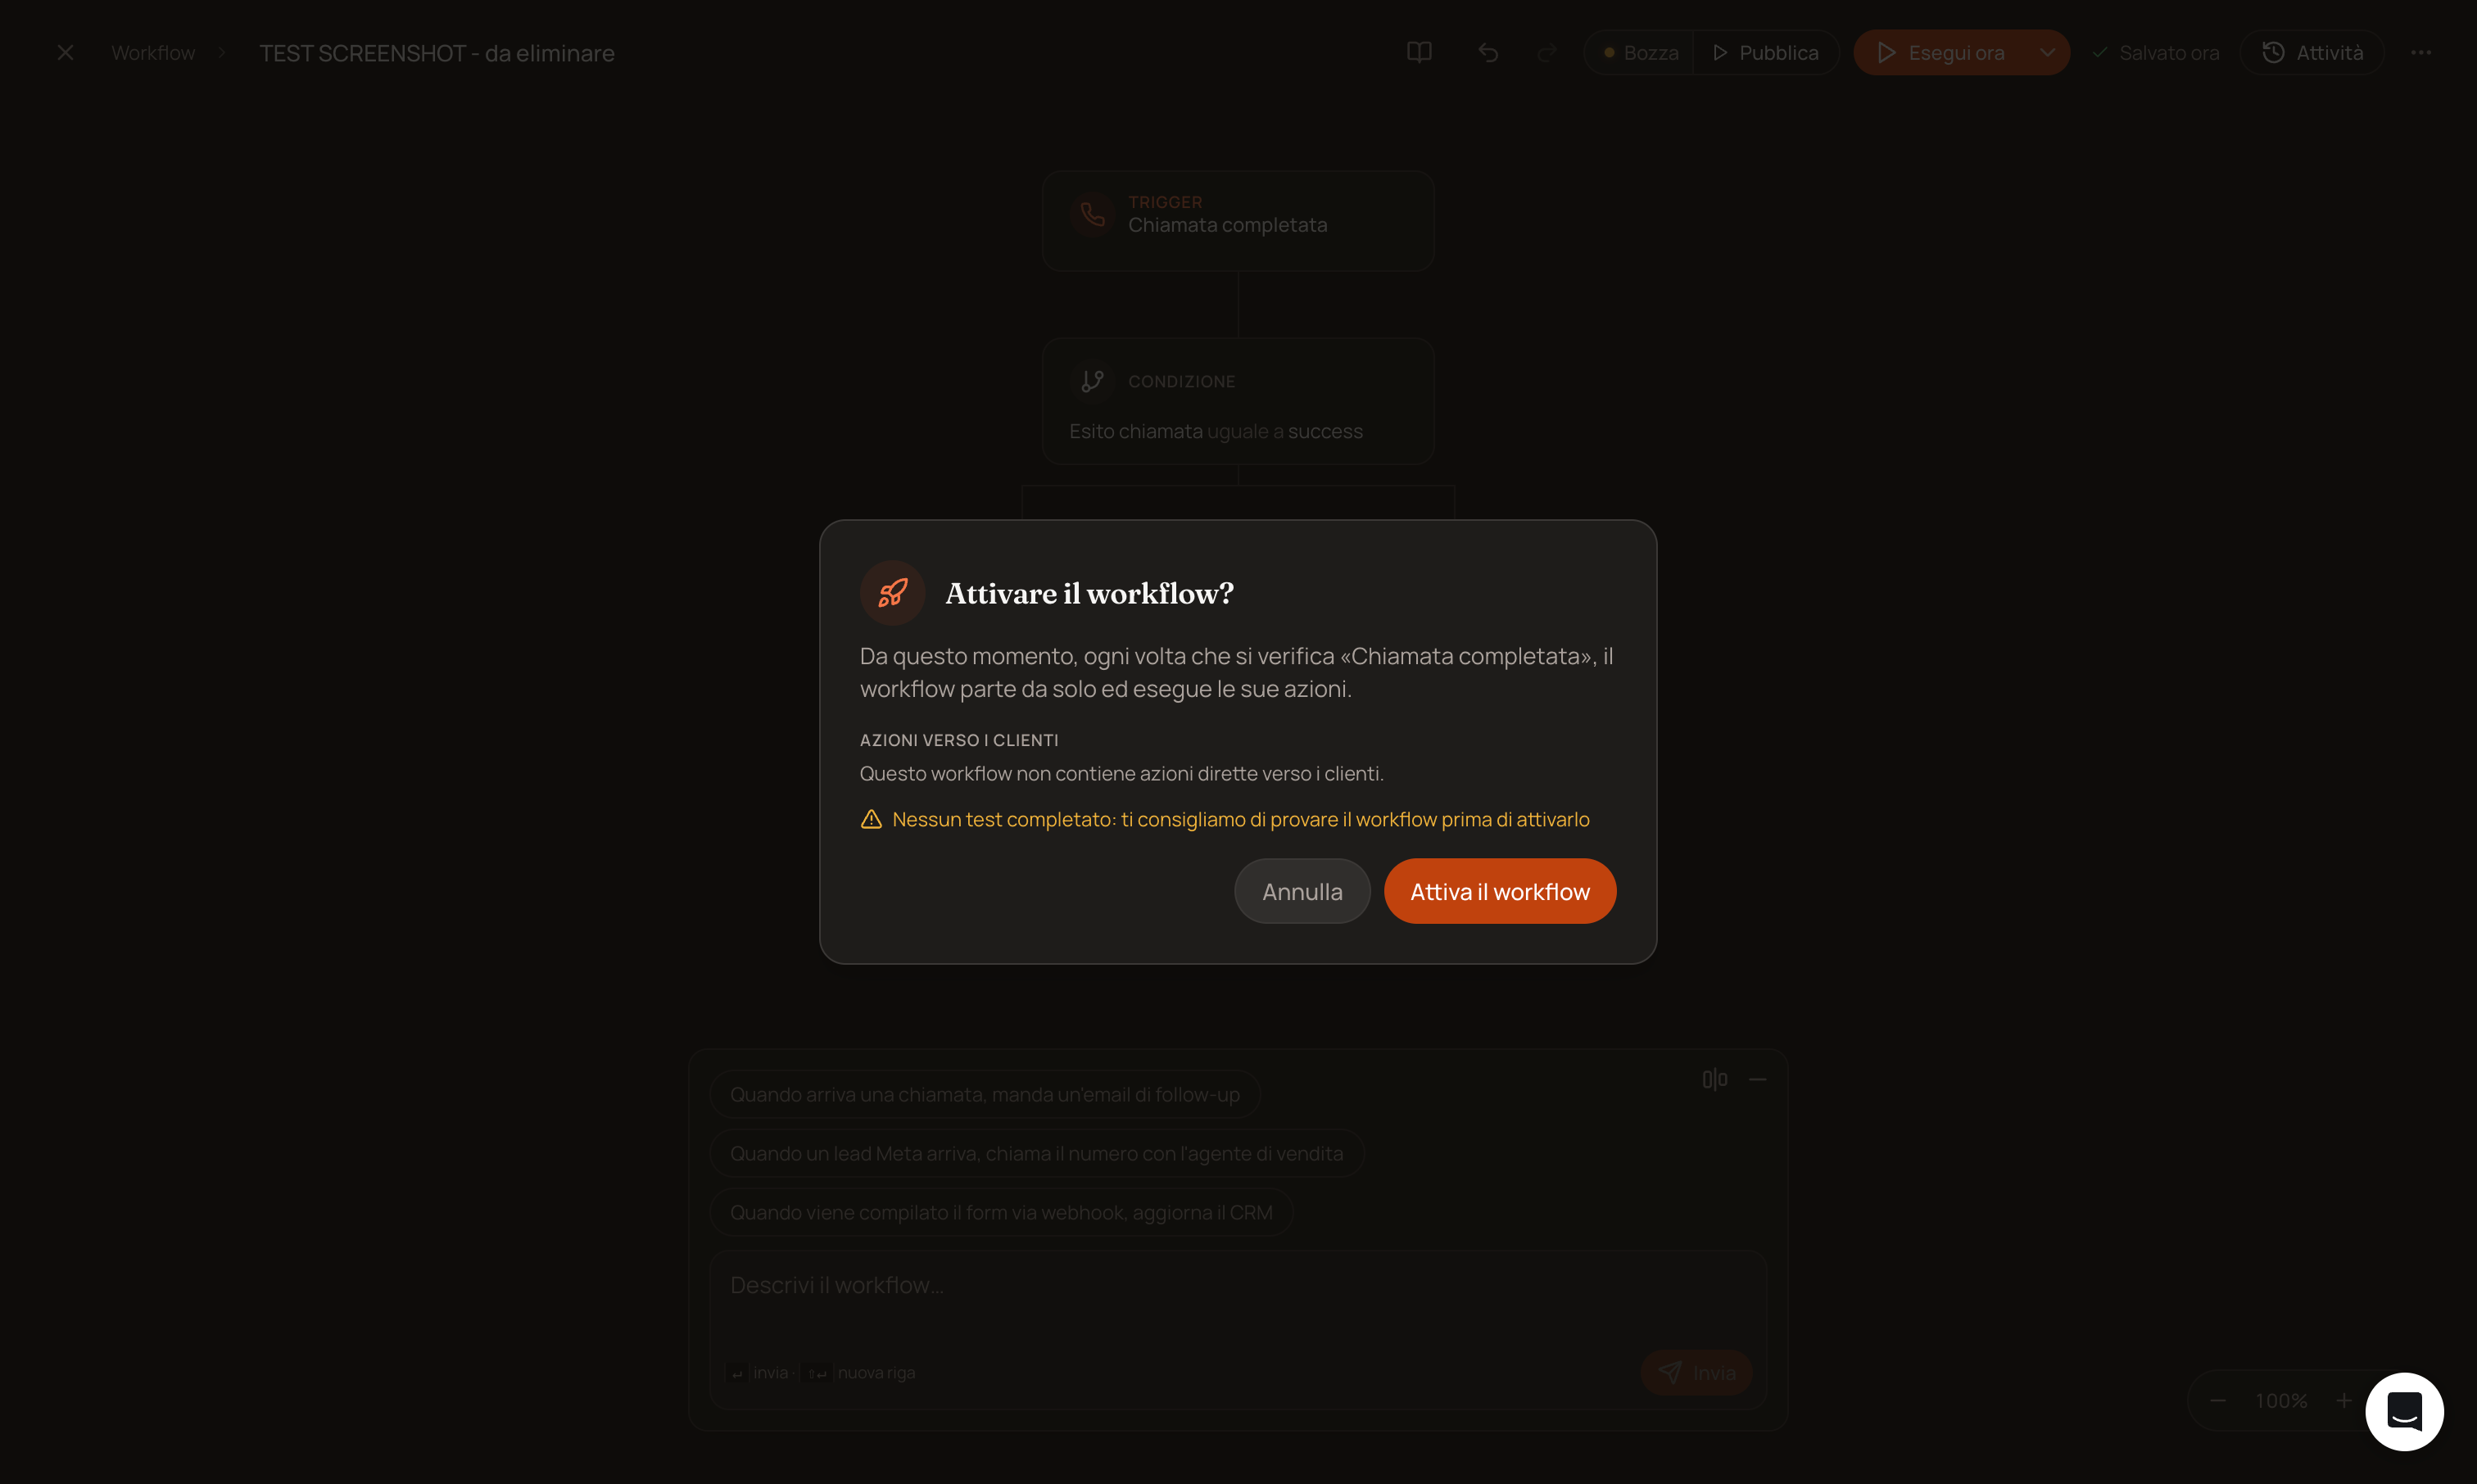
Only when the workflow is error-free will “Publish” open the actual confirmation window, “Activate the workflow?”: a summary of every action that will affect a real customer (call, SMS, WhatsApp, email, calendar event), or, if there aren’t any, it explicitly tells you so (“This workflow does not contain any actions directed at customers”). If you haven’t tested the workflow yet, you’ll also see a yellow warning advising you to do so before activating it. After publication, the button becomes an On/Off toggle, allowing you to deactivate the workflow without having to republish it from scratch.
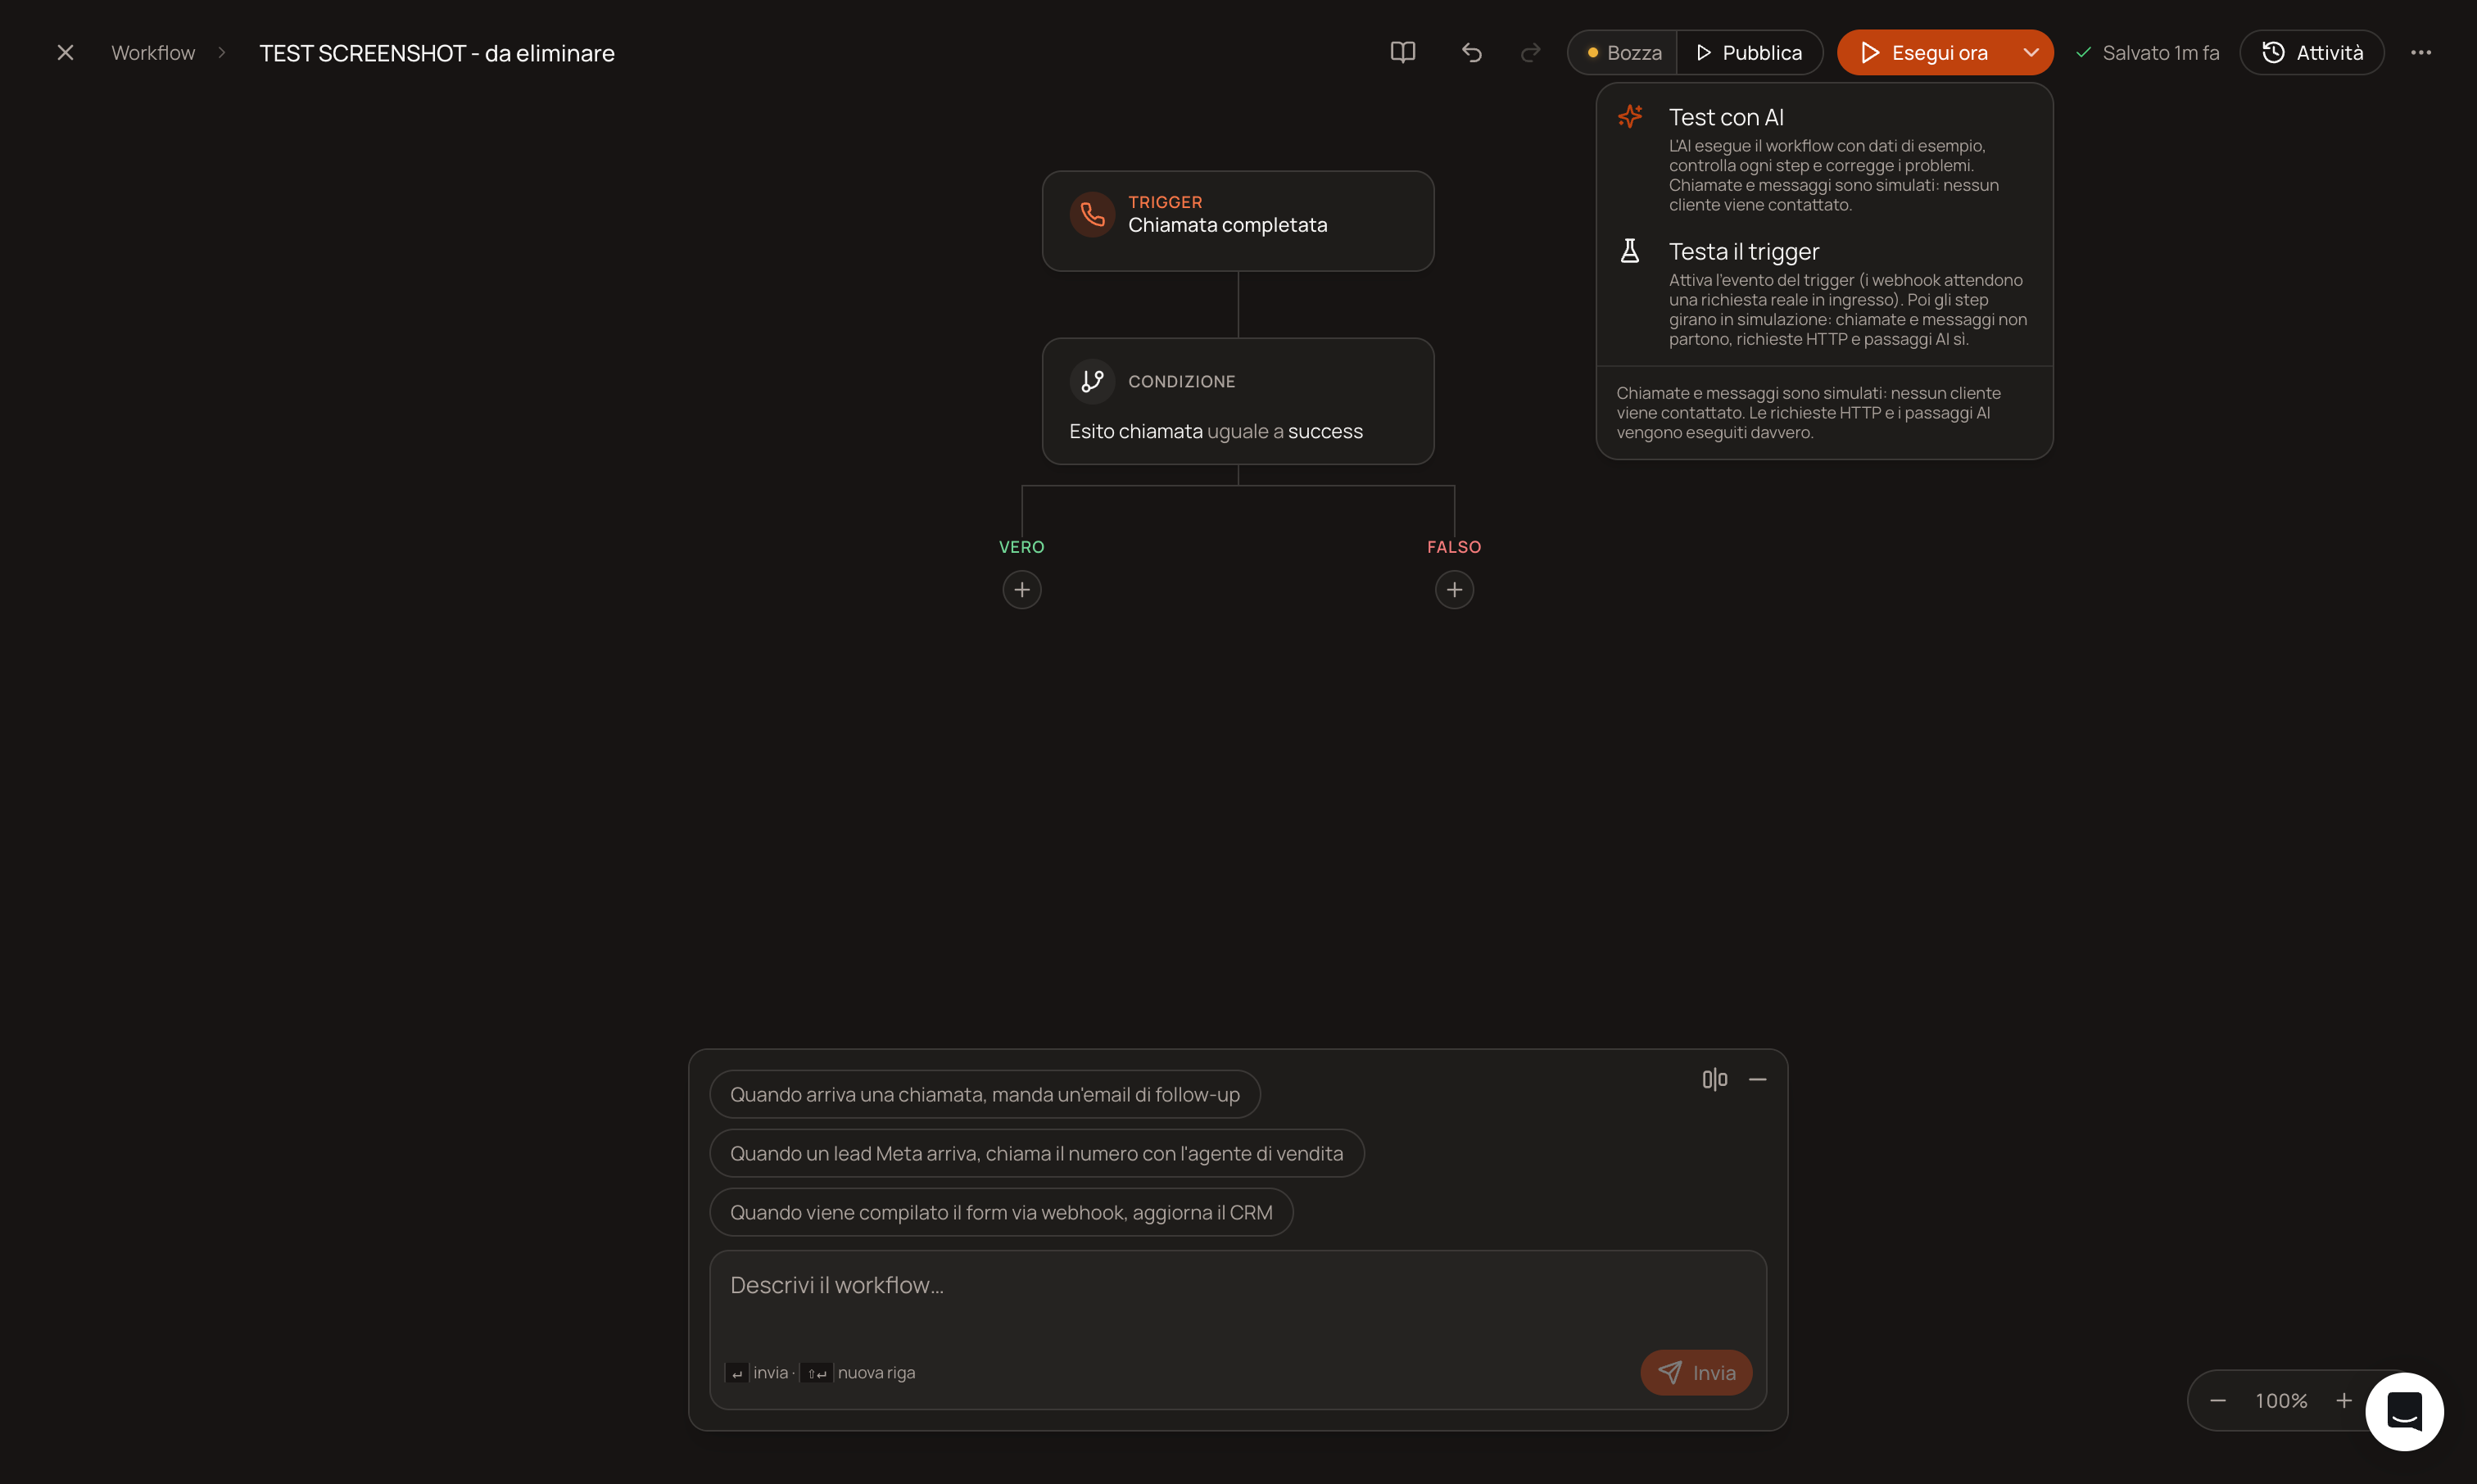
How to test: 3 modes, accessible from the menu next to the main button:
"Run Now": Immediately runs the entire workflow with test data, regardless of the trigger (even if it’s a webhook, it doesn’t wait for an actual call).
"Test with AI": An AI runs the workflow with sample data, checks each step, and tries to correct any errors. Calls and messages are simulated—no customers are actually contacted.
"Test the Trigger": actually triggers the event (for a webhook, it opens a panel with the test URL and waits for a real HTTP call); from that point on, the steps still run in simulated mode, except for HTTP requests and AI steps, which are executed for real.
In any test mode: calls and messages never reach a real customer, unless you’re watching the live execution of a webhook that you’ve actually called yourself from outside the system.
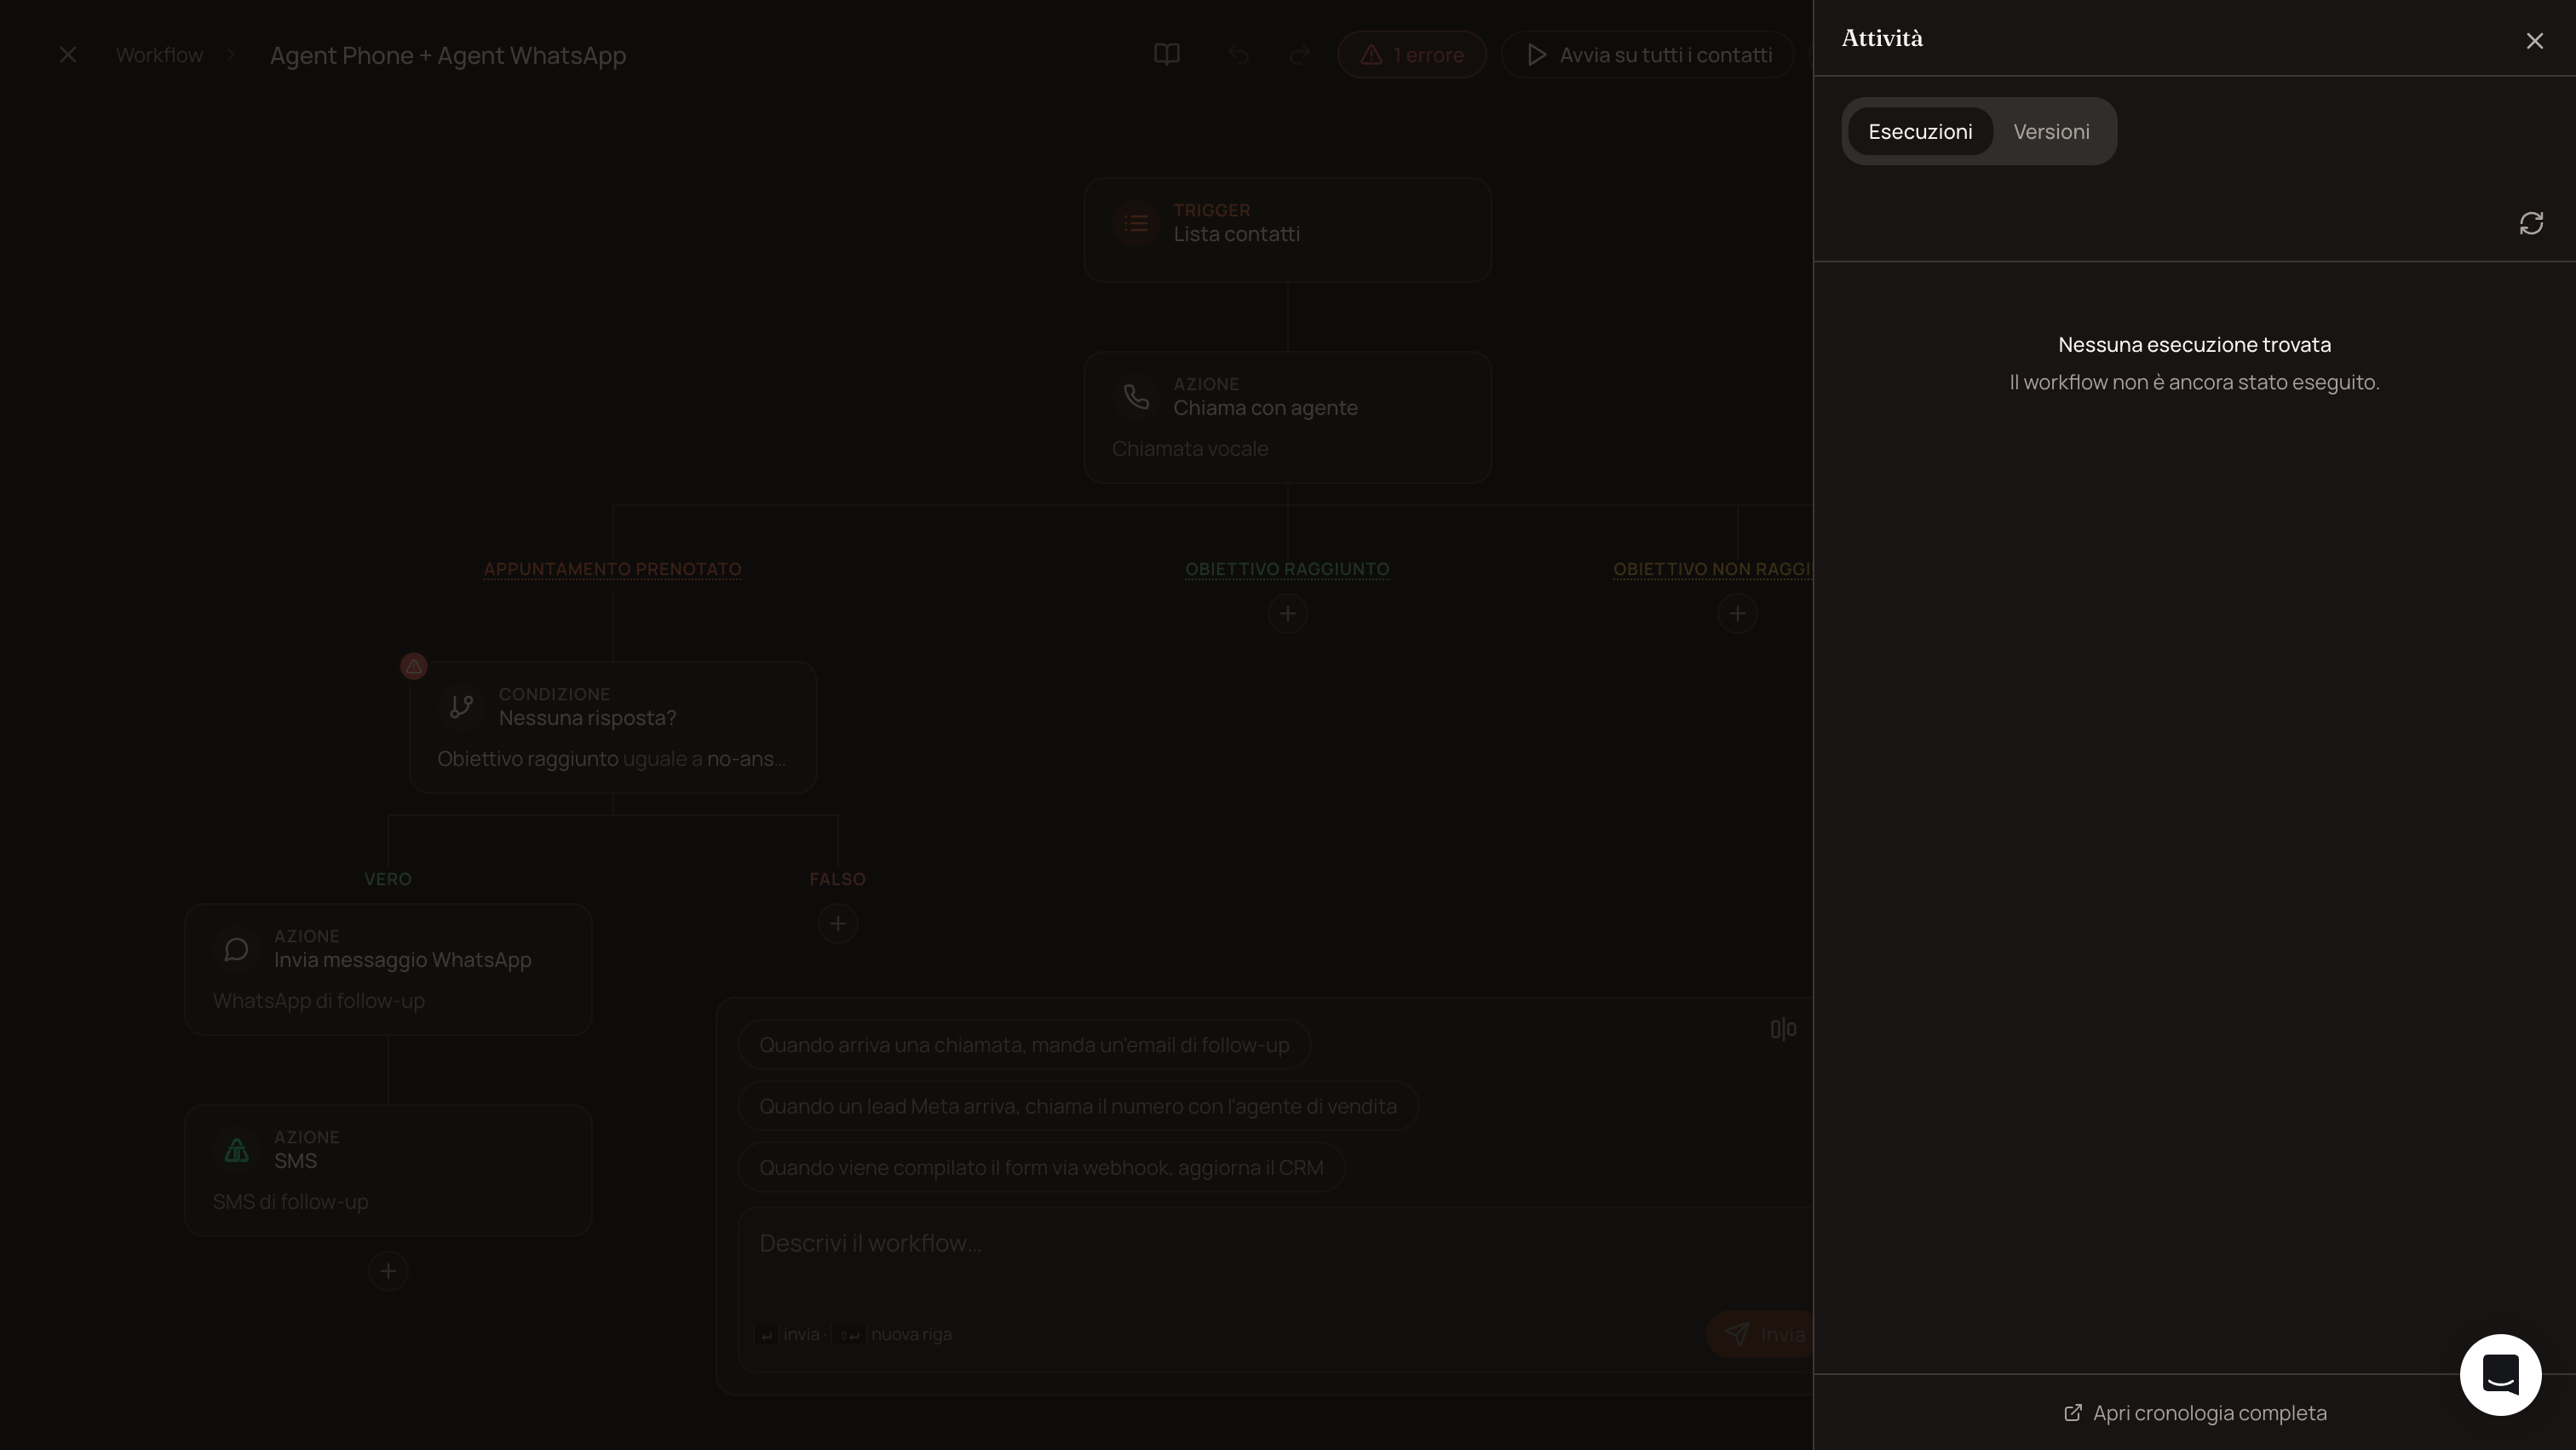
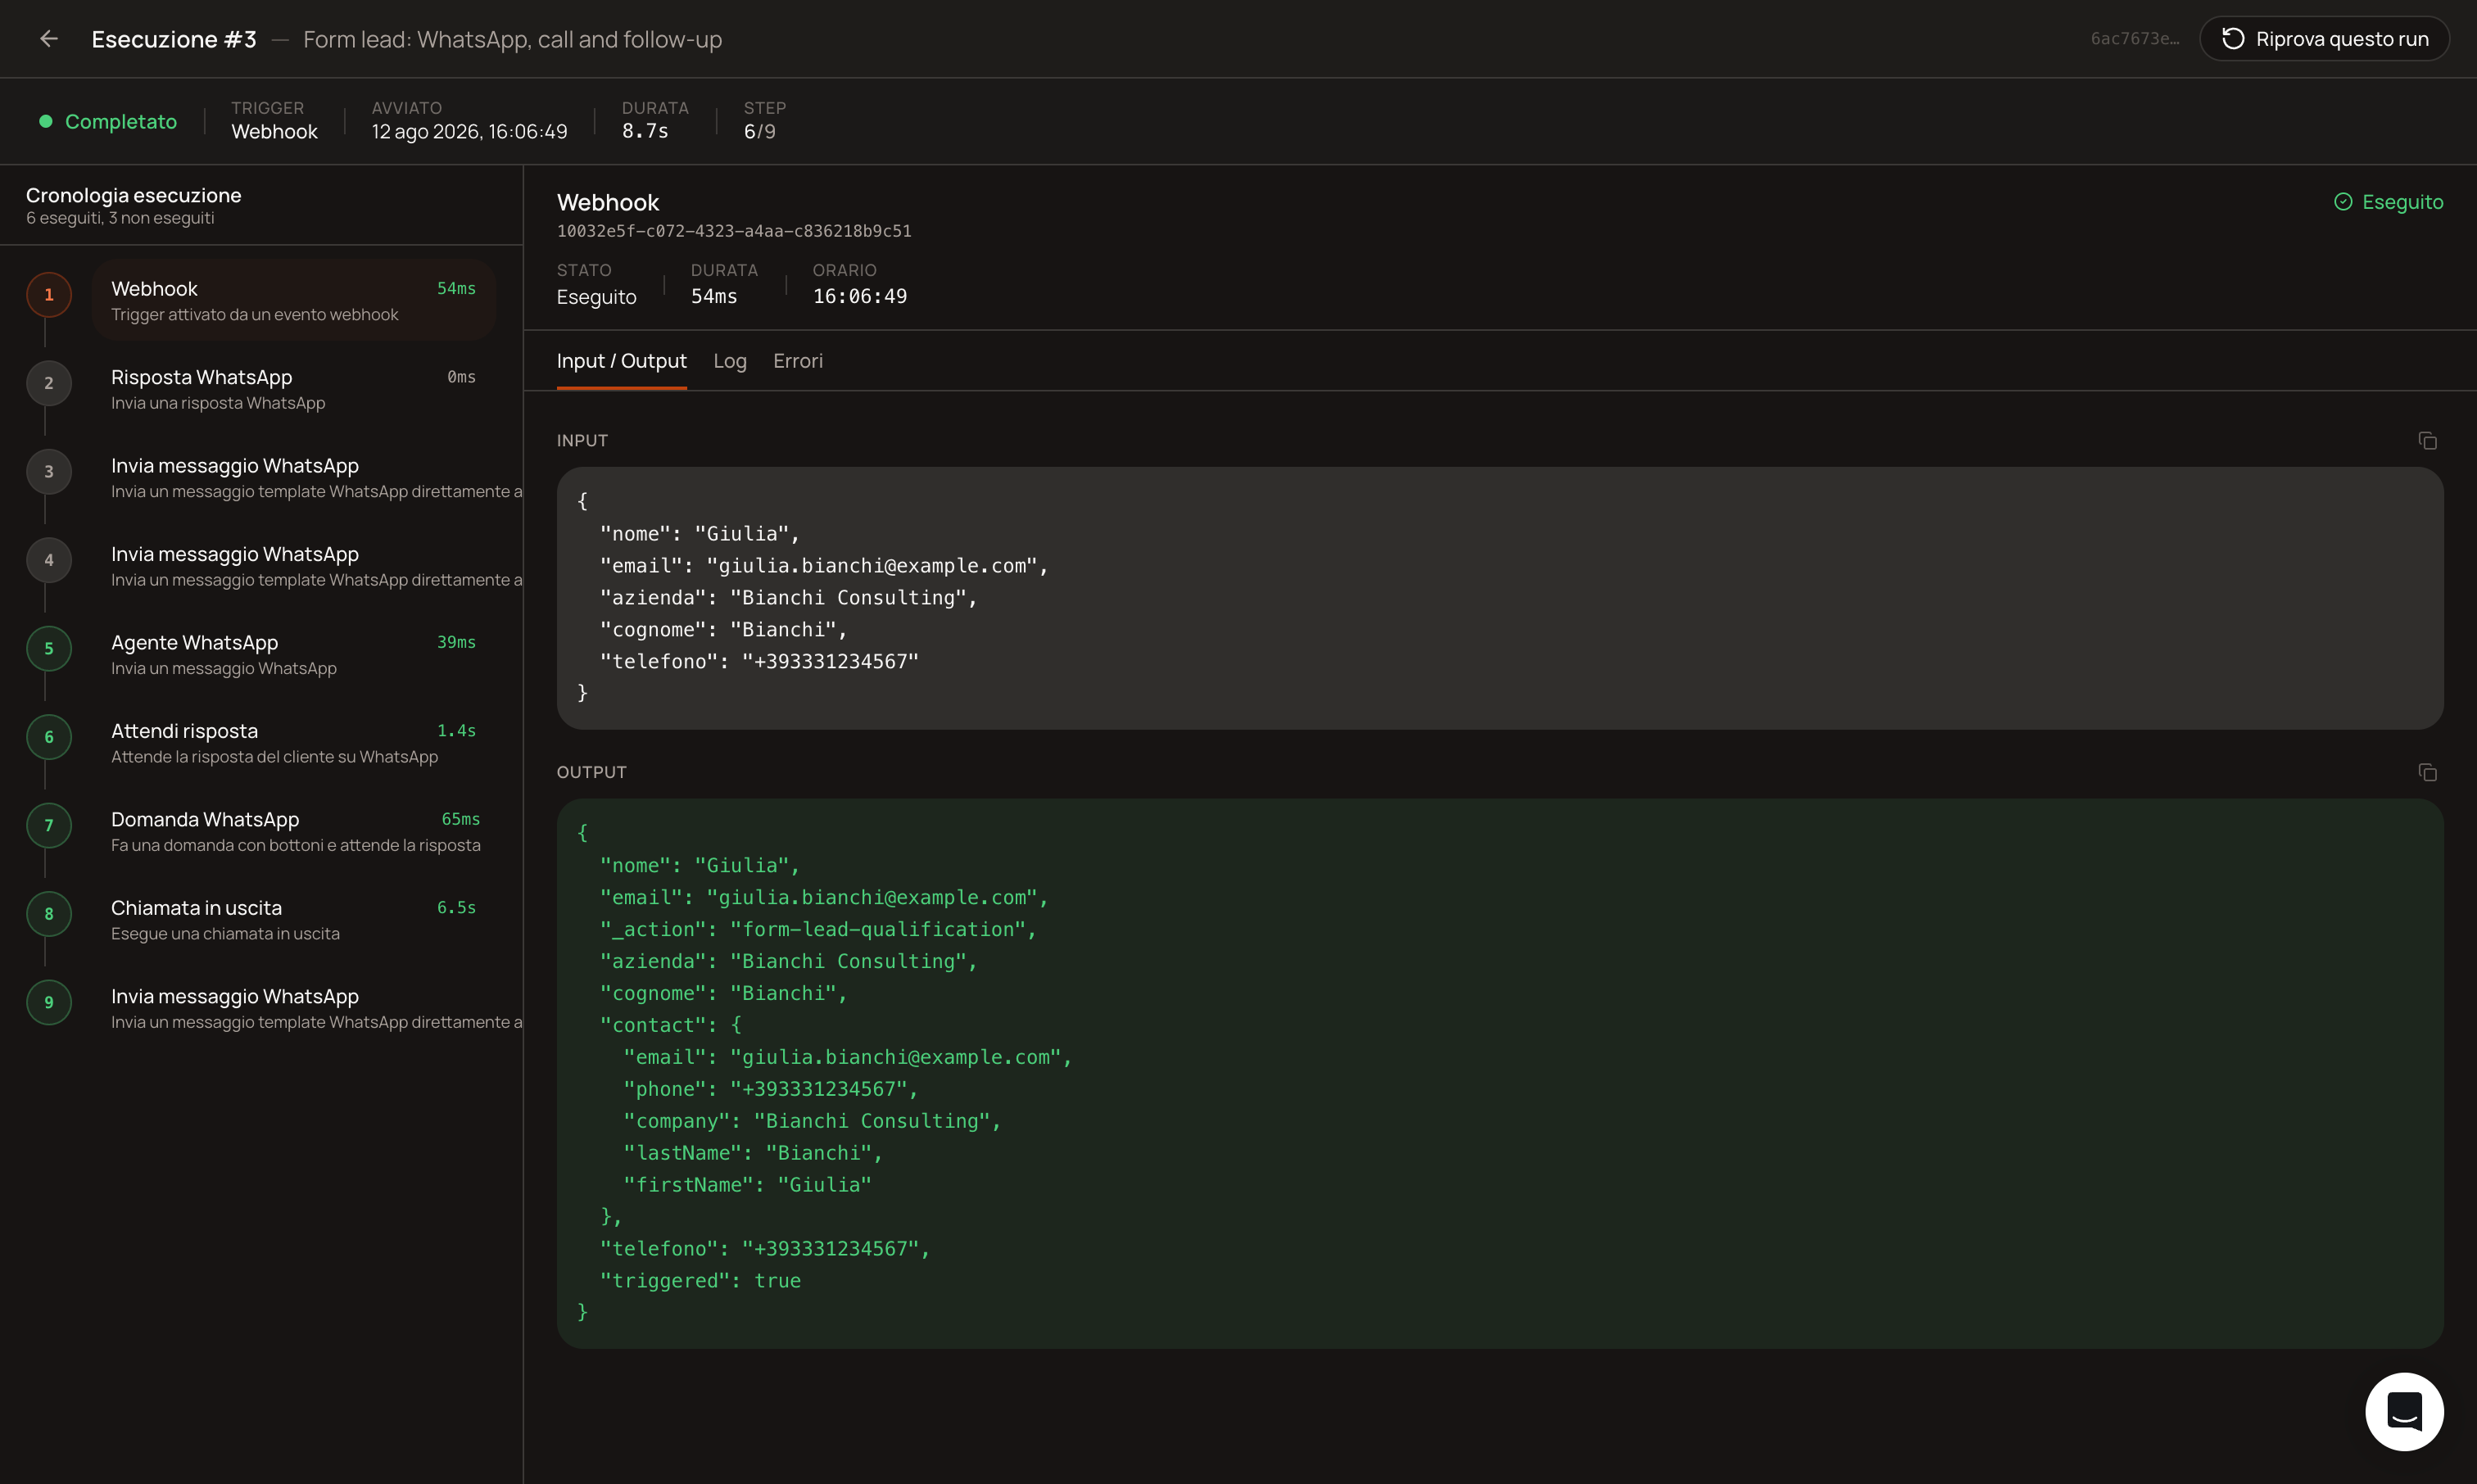
Execution history: the “Activities” button at the top, with two tabs: “Executions” (a list of all past executions, showing status, trigger, and duration, along with a button to rerun them) and “Versions” (to revert to a previously saved configuration). When you open a single run, you can see, step by step, what went in and what came out of each step, a log written in Italian, and—if something failed—a “Try to Fix” button that sends the error directly to the AI chat for guided troubleshooting.
8. What to Know Before Building (Real Limits, Not Hypothetical Ones)
There is no “WhatsApp agent having a conversation” block within the canvas. The node called “WhatsApp Agent” only sends a template. For a true WhatsApp conversation that qualifies leads or responds on its own, the WhatsApp agent remains a separate product (you build it in the WhatsApp builder): the workflow connects to it only via the “Incoming WhatsApp” trigger and the question/response/wait blocks described above, not with a single “have the agent speak here” node.
“Update CRM” does not yet have a configuration panel. Do not build a workflow around it: it is not usable at this time.
A published workflow that uses the “Webhook” trigger must be verified with the team before relying on it in production for a critical scenario: the testing part is solid, but if your case depends on a webhook arriving continuously from an external system, run a confirmation check with the platform support team before shutting down the manual process.
Workflows that remain “waiting for a call” or “waiting for a WhatsApp reply” (the “Waiting for call” and “Waiting for reply” statuses you see in the history) should resume automatically when the event occurs: a bug that prevented this was fixed on August 11, 2026. If you have a critical issue that depends on this, verify with the team that the fix is active in the environment you’re using before relying on it in production.
Was this helpful?
Still need help? Share an idea